- Compass Rose God Rolls
- Fortunate Star God Rolls
- Crowning Duologue God Rolls
- Ergo Sum God Rolls
- Perfect Paradox God Rolls
- Corrasion God Rolls
- Aberrant Action God Rolls
- Hunter Builds
- Warlock Builds
- Titan Builds
- Salvation’s Edge
- Warlords Ruin
- Crota’s End
- Ghosts of the Deep
- Root of Nightmares
- Spire of the Watcher
- King’s Fall
- Vow of the Disciple
- Vault of Glass
- Lost Sectors
- Featured Raid & Dungeon
- Exotic Mission Rotator
- Trials of Osiris
- Dares of Eternity
- Max Light Level
Select Page

How to get Xenophage in Destiny 2: The Journey Quest
by Ryan Schilling | Apr 24, 2024
The Journey is an exotic quest that begins near Sorrow’s Harbor on the Moon. From the transmat point, head towards the central Hive fortress in the area. Inside the main entrance, look for a hallway to your left and follow it until you reach the area called the Enduring Abyss. Continue down the path and keep an eye out for a ledge on the right side of the hallway. Jump up here to find yourself in a place you may find familiar from the Shadowkeep campaign. This is the balcony overlooking the first pyramid ship that we discovered.
Around this balcony, you will notice four Hive statues. You need to activate these statues in the correct order to begin your quest. The order is as follows:
- The right statue nearest the pyramid ship
- The left statue furthest from the pyramid ship
- The left statue nearest the pyramid ship
- The right statue furthest from the pyramid ship

Hive Statues, Xenophage Quest
Once you activate the statues in the correct order, a chest will appear containing the beginning of your quest for the exotic heavy machine gun Xenophage.
Xenophage Exotic Quest Requirements
The Xenophage exotic quest does have one pre-requisite – you must own Destiny 2’s expansion Shadowkeep which grants access to The Journey exotic quest.
How To Unlock Xenophage, Step-By-Step
Step 1: emerge from the darkness.
After you have successfully begun your quest, fast-travel to the Sanctuary transmat location on The Moon, mount your Sparrow, and immediately head down the right path toward Anchor of Light. Once you reach Anchor of Light, head left toward the Fallen outpost built on the cliffside.
Inside this outpost, you will find a mount of what appears to be Hive growth. Interact with this mount to pick up the Light and you will receive the buff Torch Bearer which will begin a countdown timer. Your objective now is to seek out braziers located in the area and light them. The first one can be found in the very same room where you picked up the ball of Light.

How to get Xenophage, Destiny 2
From the first brazier, head north and take the path toward the center of the Anchor of Light area. Before you reach the triangle-shaped Fallen outpost draped in purple tarps, turn left to find an alcove that drops into a pit. On the ledge near this pit is your second brazier to light.
From the second brazier, head back towards the initial outpost, but look for a small building quickly to your left. Inside this room, you will find your third brazier to continue lighting your path.
The next brazier is tucked away in the upper levels and criss-crossing bars of the initial outpost. Head back to that outpost, jump your way up to the fourth brazier, and light it.
Next, follow the cliffside of the initial outpost until you notice a short ramp half-buried in the sand to the top of a cubic structure. At the top of the ramp will be your fifth brazier.
The sixth brazier is fairly simple to find. Jump onto the top of the central circular building in Anchor of Light and it can be found right in the middle of the roof. Lighting this sixth brazier should grant you the new buff Torch Bearer.
With the Torch Bearer buff in hand, head back towards the initial outpost where your path began, but before you reach it, look for a small Hive pylon with an opening on it. Here is where you will deposit your ball of light and “emerge from the dark”. Congratulations on completing the first step of your quest towards obtaining Xenophage!

Step 2: Find the Fragments
The next step in your quest will have you navigating to four Lost Sectors around The Moon. After you complete each Lost Sector, you will find a set of Hive runes laid out in 3 rows and 3 columns that will be the key to securing these fragments. You need to shoot these runes in a particular order. Wait for the flame animation over the runes to complete after each shot to ensure your selection is locked in. Once you correctly shoot the sequence of runes, a chest will spawn containing the required Path Fragments for completing this quest step.
In the K1 Communion Lost Sector , you will need to complete the Lost Sector and shoot the runes found here in the following order:
- Bottom Left
- Bottom Right
In K1 Crew Quarters , your sequence of runes is a bit longer. Complete the Lost Sector and shoot the runes in the following order:
- Middle Left
- Middle Middle
- Bottom Middle
In K1 Revelation , the order for shooting the Hive runes is as follows:
- Middle Right
If you are following this guide in order, only K1 Logistics remains. The sequence is as follows:

Step 3: The Pit of Heresy
The next quest step will require you to jump into the Pit of Heresy Dungeon . Progress through the dungeon as normal until you reach the infamous crevasse with many doors on the other side. With Fireteam Finder, you should find a fireteam to help you complete the initial parts of the dungeon while more skilled players are likely to be able to navigate to this part of the dungeon solo.
Jump to the ledge just to the upper left of the doorway directly across the abyss. You will need to jump straight up to the next ledge directly above you. Continue repeating this to scale the wall. Once you get some good height and reach the next level of doors, begin heading further left hugging the wall. There will be an open door with some rubble inside. Near the rubble will be one Hive rune you can interact with to “Reveal Path’s End.”

Step 4: The Pit of Heresy Continued
After securing the next step of the quest from the room of many doors, continue through the dungeon as normal until you reach the encounter where you must hide and avoid the Hive Ogres. Head towards the cliffside and drop down to the lower level found there. Near the cliff’s edge on this lowest level, you will find a plate covered in Hive runes. Interact with this plate to reveal the path forward.
Platforms will rise out of the abyss below. Carefully begin platforming across them to pick up the Light ball from the furthest platform. Once you have the ball of Light, head back towards where you entered the Ogre encounter. From the point where you entered the encounter, turn right and look for the second door on the right and deposit your ball of light there.
This door will open the path to a secret boss, Volmar, The Tempted, who is the obstacle between you and your precious Xenophage. To defeat this boss you will need to leverage various damage types. Ensure you or your fireteam have weapons or subclasses that generate Solar, Arc, Void, and Kinetic damage.
Before you enter the boss room, you’ll encounter a group of Thrall. Dispatch them and then take a look around the room. You’ll see Hive runes and below them, an elemental type. You’ll also notice you have a buff such as “Fiery Dread”, “Thunderous Dread”, “Neutral Dread”, or “Abyssal Dread”. The core mechanic in this encounter is to pay attention to the buff that you have in the bottom left and dunk the Light ball at the rune that corresponds with the buff that you have active. Memorize the runes and elements in the room before the boss and you should be golden. Upon depositing the Light ball, you will receive a damage buff and you should quickly switch to your weapon of the same element and begin dealing damage to the boss.
Defeating Volmar, The Tempted will grant you the final step in your quest for Xenophage. Whether you complete the rest of the dungeon is up to you as the final step only requires us to return to Eris Morn via the Sanctuary transmat location and pick up your glorious new Exotic Heavy Machine Gun!
Divine Fragmentation Reward
Congratulations on securing one of the best damage-dealing weapons in Destiny 2! This Exotic Machine Gun not only deals great boss damage but also provides unique utility in encounters such as the Oracles in The Vault of Glass.
That is all you need to know to complete the Xenophage exotic quest, The Journey. We hope this guide helped you in growing your exotic collection. For more Destiny 2 guides like this one, keep that Xenophage locked to Blueberries.gg! We cover the Hunters’ Remembrance quest and Starcrossed quest here.
About The Author

Ryan Schilling

The order for K1 is wrong, should be 3-4-5-8-9-9-8-8
Submit a Comment Cancel reply
Your email address will not be published. Required fields are marked *
Save my name, email, and website in this browser for the next time I comment.
Submit Comment
Most Popular

Legend Lost Sector Today

Destiny 2 Where is Xur

Destiny 2 Weapon God Rolls

Destiny 2 Eververse Calendar

Best Destiny 2 Builds Today
Essential Tools

Destiny 2 Discord LFG

Best Destiny 2 Infographics
Get our exclusive D2 infographics before everyone else, for FREE! Also, a weekly email covering all the best loot at reset.
You have Successfully Subscribed!
Destiny 2 Xenophage quest: How to complete The Journey and Pathfinder puzzle steps
How to get the Shadowkeep exotic machine gun.
Destiny 2's Xenophage is an Exotic quest for those who have purchased Year 3 expansion Shadowkeep.
Released on weekly reset on October 29th, 2019 alongside Festival of the Lost, starting this machine gun works a little differently to most quests - so you might need a pointer of where to look.
However, like the recent Season of the Undying exclusive Leviathan's Breath , earning the Xenophage is shorter than most Exotic quests, and the bulk of it can be completed solo before having to delve into the Moon's Pit of Heresy dungeon.
On this page:
How to get Xenophage in Destiny 2 in brief
How to get start the xenophage quest in destiny 2, how to complete the journey's emergence step in destiny 2, how to solve pathfinder's four path fragment puzzles, where to find the descent 'path uncovered' and 'path's end' step in the xenophage quest, how to defeat volar, the tempted to finish the xenophage quest.

Here's a quick rundown of the steps needed to obtain Xenophage :
- Interact with the statues near the Pyramid to start the quest
- Light the six plates in Anchor of Light
- Complete the four puzzles at the end of the K1 Lost Sectors on the Moon
- Find the hidden switch within the Pit of Heresy dungeon
- Find the hidden orb later in the Pit of Heresy dungeon to open a secret room
- Defeat the secret boss, Volmar, the Tempted
- Return to Eris
Once the above steps have been completed, Xenophage is all yours.

To begin the Xenophage quest, head to Shadowkeep's Moon destination. You'll want to head to the area next to the Pyramid, except the portal by Eris isn't around to take you there - so you have to get there on foot.
To do this, head to the Sorrow's Harbour area, then go north through the gates of the keep.

There is a path on the left at the end of this area - take it.

Continue along it until you reach the Enduring Abyss area.

Now go just a little further down the corridor, until you see a lantern of sorts on the ground.

Just beyond it, and up and right in the wall, is a path you can take. Leap up and take it.

Continue going and you'll reach the area the portal would take you to.

Now, to start the Xenophage quest, locate the four statues to the sides - two on the left and two on the right.

You can now interact with them with the 'Emerge from the Dark' prompt, lighting it up. The aim is to light all four.

Though it could be random, we interacted with them in an anti-clockwise fashion, the closest one right first, then furthest right, then round furthest left then closest left.
Whether it works for you or not, continue interacting with them until all four light up. Doing so will see a message saying 'You have emerged from the dark - claim your path!' appear on screen, and cause a chest to spawn.

Open the chest to receive the start of the Xenophage quest The Journey, the first step of which is named Emergence.

Head to the Anchor of Light on the Moon, then head to the north-west where you'll find some yellow buildings, including one with a large radio tower:

Directly south of that is a smaller one with a doorway facing it:

Inside, you'll find the following orb location:

You need to dunk this in six locations in the surrounding area, one after another. You have one minute between each dunk before the orb disappears. We recommend scoping out the locations before hand, so you know exactly where to go. You should have plenty of time if you know where you're going first!
The locations are as follows:
1. In the same room as you pick up the orb:

2. Leave this building and head north, following the path round to the more open area, where there's the orange building in the distance. On the hill directly to the left, you'll a large fallen radio tower leaning against the hill. Underneath where it leans is the next orb deposit point.

3. Look south so you are facing the large saucer-like building in the middle of the area. Opposite that on the ground is a small yellow building. The next location is inside.

4. Head back to the north-west part of Anchor of Light to where the large radio tower is. You need to climb up the tower (approach from the south / facing the building where you found the orb) and when you go one level up, it's on the north side, on the outer edge.

5. Look north to see more yellow buildings on the ground. There's a ramp leading up to the one on the right. At the top of that is the next location.

6. Head back to the other area where the giant saucer building is, and the location is right on top.

Now to finish, you need to head back one final time towards the radio tower. There will be a waypoint on your screen at the edge of a raised path when you get close.

Activating this will then give you the Pathfinder quest step.

Next, you have to visit all four Moon K1 Lost Sectors and solve a puzzle. These appear at the end, so complete the Lost Sector as usual, then find the puzzle as you take the route leading out.

To solve it, shooting a panel will change those around it, and you have to keep going until they all match the standalone icon above the grid.
There are multiple ways to do these, but these should work for you (thanks Sipder on reddit for helping with some of the following solutions):
K1 Communion (Anchor of Light)
- Bottom left
- Bottom right

K1 Logistics (Archer's Line)
- Centre right
Swapping the last two round (Centre then Centre right) also works.

K1 Revelation (Sorrow's Harbour)
- Centre left
- Centre bottom

K1 Crew Quarters (Hellmouth)

If you get any wrong as you input, you can try and work out the solution yourself from where you left off. That said, these are tough puzzles, so it might be easier to re-run the Lost Sector to reset the puzzle and try again.

Complete each one - giving you a Path Fragment each time - so you then receive the Descent quest, with the 'Path Uncovered' step.
Once that's done, it's time to take a trip to the Year 3 dungeon Pit of Heresy. If you haven't already, you need to unlock it first before you can start exploring.
First, you need to find a hidden switch. Complete the first encounter to come to an area with a wall of doors on either side of a path. You have to travel to an upper left door that's different to the others, where you'll find the switch inside.
Here is Fuzzy Bearbarian on YouTube showing the 'Path Uncovered' location:

Once you have done the 'Path Uncovered' step, continue Pit of Heresy until you reach the second encounter, then travel down the left side to come to a giant cavern on your left, glowing green with a giant rib cage below.
Continue along the edge of this path, down the lower path, to find a plate. Activating it reveals platforms to the side, with an orb you can collect it.
Take it back the way you came until you find a route on your right. There is a door here, which you can dunk the orb in. This will lead you to a hidden room with a secret boss.
Here is WoW Quests on YouTube to show where you need to go:

The Season of the Deep is here alongside the Into the Depths quest. You can know go fishing too! Don't forget to keep an eye on the Lost Sector and King's Fall challenge rotation schedule!
To defeat Volmar, The Tempted, you have to grab orbs and dunk them in locations related to the buff you have been given.
It's worth scoping out the room first to find their locations, but it's easy to work out where each goes, as there's an elemental effect relating to the buff - Thunderous is Arc, Abyss is Void, Fiery is Solar and Neutral is Kinetic (which is the only dunking spot with no real effect).
Once you have done that, you can then damage the boss. The buff you have also relates to the damage you can then dish out at this point.
Repeat this until the boss is done for. Here is Esoterickk with how the boss goes down (performed as a solo encounter):

Once the boss is complete, visit Eris to receive the Xenophage Exotic. You don't need to complete Pit of Heresy, so if you get stuck from here, the good news is at least you have done everything needed for this quest!
Read this next
- A "high number" of Destiny 2 players have had their usernames reset by an overzealous moderation tool
- Bungie acknowledges "uncertainty surrounding the future of Destiny" following layoffs
- New Destiny project Payback no longer happening, senior execs depart
- Here's a peek at Nintendo Museum's huge controllers, Super Scope shooting gallery, and more
- Level 5's Fantasy Life i: The Girl Who Steals Time delayed to unspecified date
- Pokémon TCG Pocket will let you open digital card packs via your smartphone in October
- Dead Cells receives its final major update today, seven years after release
- Silent Hill 2 Remake drops a new story trailer, and yes, we finally get to see Eddie
- Ubisoft suffers third round of job losses this year
- These Silent Hill 3 and 4 PC mods bring a brand new perspective to these classic horror games
- Today's Wordle hint and answer on Tuesday 20th August for 1158
- Today’s Connections hint and answer on 20th August for 436
- Today's Wordle hint and answer on Monday 19th August for 1157
- Today’s Connections hint and answer on 19th August for 435
- Pokémon World Championships 2024 research tasks, rewards and bonuses in Pokémon Go
- Genshin Impact 5.0 release date, 5.0 Banners and events
- Gamescom Opening Night Live 2024 time and where to watch
- Black Myth: Wukong studio requests influencers not include "feminist propaganda" or Covid-19 references in coverage 130
- Until Dawn PC, PS5 release reportedly comes with £60 price tag 45
- You'll be able to watch The Borderlands film at home very soon, it seems 42
- Silent Hill 2's remake dares to modernise a classic, and is largely succeeding 35
- Delta Force: Hawk Ops has a real shot at knocking Call of Duty and Battlefield off their perch 28
- Final Fantasy 16 on PC gets September release date and immediate demo 24
- Today's Nintendo Museum Direct will not feature announcements or even "mention" the Nintendo Switch successor 19
New to Shacknews? Signup for a Free Account
Already have an account? Login Now
- Subscribe
- Latest Pets
- Forum: Posts today 1150
Unlock Xenophage, The Journey quest - Destiny 2
Unlock Xenophage in Destiny 2 by completing The Journey quest on the Moon for Eris Morn.

Xenophage is one of Destiny 2’s most powerful Exotic Machine Guns. What it lacks in ammo capacity and speed it makes up for in raw, overwhelming power. To unlock Xenophage, players will need to complete a quest called The Journey for Eris Morn, which starts on the Moon.
Xenophage, Exotic Machine Gun

The Xenophage Exotic Machine Gun is a Solar Power weapon that uses Heavy ammo – which surprises no one. The gun was originally introduced during Season 8 , Shadowkeep and Season of the Undying, and has seen continual use since then.
Players that unlock Xenophage will be treated to one of the slowest firing Machine Guns in Destiny 2, featuring a 120 PRM. But, more on its perks and stats below.
The Journey Exotic quest
Unlocking Xenophage will require a bit of footwork, some puzzle solving, and venturing into the Pit of Heresy dungeon . Here are the steps to unlock Xenophage:
- Go to the Enduring Abyss below the Moon
- Use a ball of light in the Anchor of Light to light up six locations
- Solve puzzles in the Moon Lost Sectors
- Enter the Pit of Heresy and find the hidden item after the first encounter
- Collect a charge during the Pariah Ogre section and use it to light two brazier to open a door
- Slay Volmar, the Tempted
Step 1: Go to the Enduring Abyss
To get The Journey quest for Xenophage, you will need to reach the Enduring Abyss area beneath the Moon. Begin by loading in at the Sanctuary fast-travel point on the Moon. Head through the portal near Eris (if it's there) and follow to the point where you can see the pyramid. If the portal is not there, you'll have to take the long way. Use the embedded video below to help you find the Enduring Abyss location.
When you reach Enduring Abyss you'll find four statues, two on either side from where you look out towards the pyramid. Do not touch any statues until you're ready to begin. They should not be lit at all.
You will need to light them in the correct order. To do this, approach the statues in a clockwise direction and press the interact button when the message “Emerge from the Dark” appears. When all four are lit, a chest will spawn which contains The Journey, the Exotic quest for the Xenophage Exotic Machine Gun in Destiny 2.
Step 2: Emergence
The actual first step of The Journey will take Guardians to the Anchor of Light region on the Moon. Once there, an orb (ball of light, if you will) can be picked up. This light can then be taken to six nearby locations. At each one, Guardians will have to hold the interact button to Light Your Path. The six locations must be hit in the correct order, which is why we have a video of this step embedded below.
Step 3: Pathfinder - Lost Sector puzzles

The Pathfinder section of The Journey tasks players with solving puzzles in Lost Sectors. These are flip puzzles, where shooting a symbol flips all the symbols on its cardinal plane to the next icon. The puzzles are all found at the very end of the Lost Sector, after defeating the boss and going through a locked door.
You will need to complete all four puzzles in each of the Moon’s Lost Sectors to find the path fragments. Credit to the Raid Secrets community for the solution to some of these puzzles.
K1 Revelation

- Left middle
- Bottom middle
- Right middle
K1 Logisitcs

- Bottom left
K1 Communion

- Left bottom
- Right bottom
K1 Crew Quarters

- Middle bottom
Step 4: Descent

The next step to unlock Xenophage is to dive into the Pit of Heresy dungeon. Depending on your experience level, you can either do this solo or as a fireteam of three.
Clear the first encounter, collect your reward from the chest, and then press onwards. When you reach the wall covered in doors, look up to the left to spot one without a chain hanging over it. Use the wall to climb up to this door. Inside you will find a stone you can interact with that reads "Reveal Path's End". Interact with the stone and move on to the next step.
Step 5: Discovery

The next step also takes place in the Pit of Heresy dungeon, in the second encounter with the invincible Pariah Ogres. Along the left-hand side of the area is an abyss, but there's a ledge just over the edge. Drop down to it and stand on the plate while holding the appropriate button to "reveal a path". Jump across the floating platforms and collect the charge.

Take it back the way you came, sticking to the right-hand wall. You will need to use the charge to light two plates near a small door. This causes the door to open, granting you access to a hidden boss and the last step. This whole step is best attempted when the ogres disappear after clearing the encounter.
Step 6: Slay Volmar, the Tempted

The final step in unlocking Xenophage is to defeat a hidden boss in the Pit of Heresy dungeon, Volmar, the Tempted. This boss fight requires you to use specific elemental damage against Volmar.
When you enter the first room, look at the bottom left of your screen to see what elemental charge you have. Find this element type in the corners of the first room. You will need to memorize the symbol as you must now find that symbol in the boss room. Go into the boss room and search for the symbol. When you find it, activate it. This will give you a short timer allowing you to deal damage of that specific element type. When the time is up, you will need to repeat the process of finding the matching symbol.
Repeat this until Volmar, the Tempted dies. At this point, you can return to Eris Morn to unlock the Xenophage Exotic Machine Gun.
Xenophage perks

The majority of Xenophage’s perks are rather average and even unassuming. However, they work together to make this thing hit like a truck.
- Full Bore – Barrel optimized for distance. Greatly increases range, decreases stability, and slightly decreases handling speed.
- High-Caliber Rounds – Shots from this weapon knock the target back farther. Slightly increases range.
- Rangefinder – Aiming this weapon increases its effective range and zoom magnification. Increased projectile velocity while aiming Rocket Launchers and Grenade Launchers.
- Composite Stock – This weapon has a versatile dual-purpose stock. Slightly increases stability and handling speed.
Xenophage’s Exotic perk is Pyrotoxin Rounds. This is what makes it so powerful.
- Pyrotoxin Rounds – Fires high-powered explosive ammunition.
This unassuming perk ensures that Xenophage deals ludicrous damage. In fact, if you’re not using Anarchy, you’re likely going to want to use Xenophage as your boss damage tool. It’s even great at knocking down Champions and Wyverns.
Xenophage lore

This might sting a little.
There was only darkness… until there was Light. Again. A third time. I knew it. Knew I'd be back one day—only this time, I was something else. Something… not Human. Not by choice, of course. Those damn Hive. They weren't just tryin' to kill me. They were using me to get to my Light. To drain it from my soul. For their sick experiments. But the idiots screwed up. They didn't just drain my Light. They took the whole lot. The entire thing. Soul and all. I'm still me. I'm just not the me I knew. The one with two arms and two legs. I'm something smaller now. But honestly, it's no bother. The fire inside me… it came too. And it rages now more than ever before. The fools have no clue what they've done. No idea the price they'll pay. I'll have my vengeance. In this life, not the next. —Omar Agah
Unlocking Xenophage in Destiny 2 is a lengthy process that requires fighting through the Pit of Heresy dungeon as part of the quest, The Journey. As with all dungeon runs, it's best to take a fireteam with you. Check out our Shacknews Destiny 2 complete strategy guide for more Exotic weapon walkthroughs.
Bill and Sam are the two Shacknews writers who handle the bulk of the Destiny 2 content. As a Hunter and Warlock main respectively, they can cover a great deal of ground with whatever is happening in Destiny 2 today. What they don't know they can find out thanks to their all-star lineup of Destiny 2 friends.
- Destiny 2: Shadowkeep
- Destiny 2: Season of the Undying
Bill Lavoy and Sam Chandler posted a new article, Get the Xenophage Exotic Machine Gun in Destiny 2
The fragments are in each of the four lost sectors on the Moon, the will have hive puzzles at the end of the lost sectors you are to solve.

Destiny 2: how to get the Xenophage exotic machine gun
How to get the Xenophage in Destiny 2—our complete quest guide.

With the launch of the Festival of the Lost, Bungie has also released its latest exotic weapon quest: The Journey.
Through completing The Journey, players will be able to unlock the new exotic machine gun, Xenophage.
As Destiny 2’s second exotic machine gun, Xenophage offers a unique and powerful set of perks. Its slow rate of fire makes it feel more like a single-shot anti-artillery weapon, but holding the trigger proves it is an automatic.
Each shot fired from this 13 round magazine provides a devastating punch with a small explosive radius that can tear through waves of enemies. In total the weapon can hold two magazines of ammo and its inability to deal crit damage seems a little odd, but it was able to tear through Nightmares with ease so it’s definitely worth getting.
Here’s how to pick up Xenophage.
Step 1: Embrace the Light
To start this quest you’ll need to go to the Moon and enter the portal next to Eris (you can also get here through Sorrow’s Harbor). While in the room where Eris usually sits after completing a memory you will see four statues. Each statue can be interacted with and will light one of the other four statues around the room.
To successfully light all four at once, interact with the statues in the following order (taken from the perspective of entering the room): front right, back left, front left. Upon lighting the final statue, a chest will appear and reward you with The Journey.
The biggest gaming news, reviews and hardware deals
Keep up to date with the most important stories and the best deals, as picked by the PC Gamer team.
Step 2: Lighting the way
After acquiring The Journey you will be given some very cryptic steps that allude to the Anchor of Light on the Moon. Head to the Anchor of Light and move towards the large tower on the left side. Within the small building under the tower to the left when you enter there will be a fire. Interacting with this fire will give you a buff.
When in possession of the buff you will need to run around the Anchor of Light and activate six lecterns in a specific order. If you fail to interact with these lecterns in the right order, you will lose your buff and will need to start over. You can see the correct path below, with help from our pals at GamesRadar+ .
Step 3: Solve the Lost Sector puzzles
After lighting the fires in the previous step you’ll be treated to another series of rather ambiguous clues. What these clues really mean is that you need to venture into the Lost Sectors on the Moon, all four of them, and complete a puzzle that can be found on the wall at the end of each past the final chest.
These puzzles are all based on rotating tiles. Shooting a tile will alter the 3x3 grid in different ways. Your goal is to rotate all the objects in the correct order until the entire puzzle matches the symbol placed above it. To save you the heartache of completing several mini Rubik’s Cubes, here are the solutions to each puzzle from their starting position below. The notation below matches up with a standard computer number pad.

K1 Communion: 1, 3 ,8, 8
K1 Revelation: 6, 4, 5, 5, 4, 8, 2, 5
K1 Logistics: 7, 1, 6, 5
K1 Crew: 9, 4, 5, 2, 3, 3, 2
After completing all four of the puzzles and obtain four map fragments, you will unlock the next step in unlocking Xenophage.
Step 4: Journey to the Depths
Now that you’ve got a full map you will need to complete the first phase of the Pit of Heresy. Directly after you complete this section and unlock the chest you will be faced with a wall of doors. Look for the door that does not have a rune hanging over its awning and jump inside. While you are inside you will want to interact with another rune and proceed to the next encounter.
Step 5: Light more torches
Within the second encounter, while the invulnerable ogres are chasing you, there will be a series of Hive runes on the floor at a cliff at the far side from where you dropped down. As you interact with the runes, a series of platforms will appear in the chasm in front of you.
Jump over these platforms and acquire the fire. With the fire in hand, continue back the way you came from and stick to the right-hand side. This might prove tricky due to the ogres, but your end goal is to locate a door with two lecterns outside and light them (similar to those you lit in step 2.) When you light them, the doors will open and you can progress to the final step in the quest.
Step 6: Defeat the Hive Witch

As the doors open you will enter a room with four different runes in each corner. Each of these runes corresponds to an energy type indicated by the glowing orb below it. Blue represents arc, red represents solar, purple represents void, and white/colourless represents neutral. In the next room there will be a boss roaming the area, an object that contains a glowing orb of light, and four different places to deposit this light.
To damage the boss you will first need to look at the debuff you are currently affected by at the bottom left of your screen (void, solar, arc, or neutral), match it with a rune in the first room, and then find the matching rune within the second room where you should then deposit the light you’ve picked up. After depositing the light you will receive a buff for 30 seconds that will allow you to damage the boss using attacks of that specific energy type and only that specific energy type. So make sure you have a varied loadout.
Continue to follow the process of matching your debuff with the correct rune and following up with the correct damage until the boss is defeated. As the boss slowly falls you’ll be awarded with one final item that should be returned to Eris, and in exchange for this item you will receive the Xenophage.
Now it’s time to rip through some enemies like cheap toilet paper. Have a look at the Xenophage in action below:
The FDA just cleared 'Traumagel,' a wound-treating gel with 'the color and texture of hummus' that sounds like a real-life FPS medkit
According to a creator of the ambitious H2M Modern Warfare 2 mod shuttered by Activision, the multi-billion dollar corporation was worried the free project would disrupt Black Ops 6's sales
The new highest-level Steam user in the world spent over half a million dollars to do it, has a 'Discord Kitten,' a $9,000 Counter-Strike gun with a racial slur on it, and potential beef with the guy in third place
Most Popular
- 2 Best Mini-ITX motherboards in 2024: My pick from all the mini mobo marvels I've tested
- 3 Best RAM for gaming in 2024: I've tested the best DDR4 and DDR5 RAM to find the right kits for you
- 4 Best ultrawide monitor for gaming in 2024: the expansive panels I recommend for PC gamers
- 5 Best wireless gaming keyboard in 2024: my top picks for cable-free typing delights
- 2 Black Myth: Wukong review
- 3 LG UltraGear 32GS95UE review
- 4 Sins of a Solar Empire 2 review
- 5 AndaSeat Kaiser 4 XL review
- Ethics Policy
- Ownership Policy
- Corrections Policy

Destiny 2 – The Journey – How To Emerge From The Dark – Lectern Lighting Order
The Journey quest in Destiny 2 can be a bit confusing, so in this guide, we will show you how to emerge from the dark for the Emergence step.
As part of the Xenophage quest, you will need to figure out how to emerge from the dark as part of The Journey exotic quest. The first step, Emergence, talks a lot about Crota, but this is a bit of a red herring. You need to head to the Anchor of Light, to light some Lecterns.
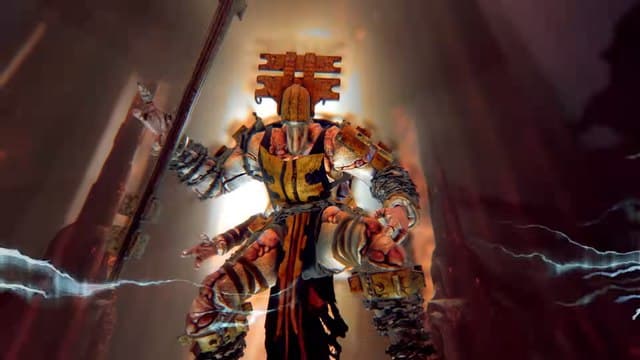
Head for the Anchor of Light, then go the point shown on the map above. This is where you will begin this part of the quest. You need to grab the Light from the strange relic in the small building shown in the header image above. The exact location can be found on the map. Once you have it, you need to light six lecterns, in the correct order.
There was a lot of trial and error done by the community for this one, but eventually, the good folks over at Raid Secrets on Reddit got it all worked out. My hat is off to them, and their amazing ability to expose Destiny 2’s secrets. The easiest way to show you the correct order to light them in is via a video. As such, I have recorded where to go, where the Light is, and what order you need to light the lecterns in. Just check the embedded video above.
Once you have them all, you need to go to an area that will be marked on the map, and interact with an item there. This will move you on to the next part of the quest, called Pathfinder! We are also working on a full guide for The Journey quest here if you need help with other steps.

How to Complete Xenophage Quest in Destiny 2 2023
Use this guide to help you obtain the Xenophage in Destiny 2 2023

A relic of its time, the Xenophage quest is a long and convoluted multistep quest that unlocks the Xenophage Exotic Machinegun. The weapon is a very powerful machine gun and is the bane of many a player in Gambit.
This Destiny 2 Exotic guide will tell you all the steps necessary to unlock the elusive machine gun. But before we proceed with the guide, you should know that to have access to the Xenophage, you first need to have access to the Shadowkeep DLC and the Pit of Heresy Dungeon. We don’t believe that you start the Exotic quest without the DLC.
As an alternative, if one of your friends has access to the Pit of Heresy Dungeon, you will have to tag along in order to complete steps 3 and onward.
Oddly enough, you can’t get the quest from the quest kiosk. It’s just odd considering you can get the Wish Ender quest from one of those kiosks. Buckle up everyone, this is going to be a long quest.
How to Start Xenophage Quest in Destiny 2
In order to get the quest, you first need to go back to the Scarlet Keep, preferably after completing the Shadowkeep campaign. Then you’ll need to summon a chest that holds the Xenophage quest.

Go through the left door and keep going down the tunnel until you see a glowing lantern on the ground. Above it, you’ll find a side passage that leads to an open-air chamber. You will find four statues around the chamber. You need to activate the statues in this order to make the chest that holds the quest appear.

The reference point is where you entered the chamber. The front side is closer to the entrance and the back one is the one beside it.
- Front right

The Journey Quest Steps
There are 6 steps to this Destiny 2 Exotic quest. They will take you all over the Moon and several of the steps will take you through the depths of the Pit of Heresy Dungeon.
The Journey Step 1
Around you… darkness. If you are to discover your path, you much anchor yourself to light.

For this first step in the Xenophage quest, there will be six braziers that you will need to light ignite using your Light. Start by going to this location on the West side of Anchor of Light . (Refer to the image above.)
All six braziers are located all around the immediate area. Even so, the braziers are located in some pretty obscure places. It may take a few tries until you get it right since you have to do it in this specific order .
1st Brazier

The first brazier is located beside the receptacle . Once you light it up, you’ll receive the Torch Bearer buff and now you have 60 seconds to get to the next brazier. Quickly exit the area and head for the main road.

The second brazier can be found on the slopes along the main road. (Look for that orange building if you lose your bearings). It is located on top of some platforms. Light it up and head back in the direction you came from.
3rd Brazier

Once you light the brazier, turn around and make your way back to the initial building. You can find the third Brazier in the corner of this buried yellow building a little ways away. (Refer to the left picture above.)
4th Brazier

Exit East and go to the multi-floor building to get to the fourth brazier . (See the picture above.) This one is located on the very top. Enter the top floors on the right side and go along steel beams to find the brazier in the back.
5th Brazier

Turn back and immediately look to your left. The fifth brazier is located on top of this yellow building .
6th brazier

The sixth and final brazier is located on top of the cylindrical building along the main road of the area.
Once you’ve lit up all 6 braziers, you no longer have a countdown timer. At the same time, a new waypoint will appear. You will need to go there to progress the quest.

Insert the Light into the receptacle to start Step 2 of the quest.
The Journey Step 2
A light shines on your path. But you have yet to bring it into focus. Until then, your path remains among the lost.
- Archer’s Line Path Fragment found
- Sorrow’s Harbor Path Fragment found
- Hellmouth Path Fragment found
- Anchor of Light Path Fragment found
For this second step, you’ll be asked to go to the end of Lost Sectors and decode a series of glyphs in order to progress the quest. Decoding the sequence requires you to shoot them so we don’t recommend any weapon that uses Ricochet Rounds or Explosive Rounds.
Anchor of Light Path Fragment Location

The Anchor of Light Path Fragment is located at the end of the K1 Communion Lost Sector . You’ll need to open the chest to get to the puzzle’s location. From there, you’ll need to shoot the following glyphs in this exact order.
- Bottom left
- Bottom right
if you do everything correctly, a chest will spawn containing the Fragment.
For the rest of the fragments, you’ll only tell which Lost Sector to go and the order in which the glyphs need to be shot. This should all work out as it did the first time around.
Archer’s Line Path Fragment Location

The Archer’s Line Path Fragment is located at the end of the K1 Logistics Lost Sector .
- Middle right
Sorrow’s Harbor Path Fragment Location

The Sorrow’s Harbor Path Fragment is located at the end of the K1 Revelation Lost Sector .
- Middle left
- Middle bottom
Hellmouth Path Fragment Location

The Hellmouth Path Fragment is located at the end of the K1 Crew Quarters Lost Sector . This one’s a bit different. To the left of the chest, you’ll a ledge with the puzzle on it. Jump onto the ledge to get a view of the puzzle.
- Bottom middle
The Journey Step 3
Your path brightens, shining through the barrier of emerald, beneath a harbor built from sorrow.
The third step in this Xenophage quest takes us all the way past the first encounter and into the first jumping section of the Pit of Heresy Dungeon.

Once you reach this section, reach this exact door, as shown above. You can use the ledges to get up there the conventional way or you can do what the cool kids do and Strand your way to the location.
Look above the doorways for a hint about the right door. If you see a doorway without a glowing green chain then you’re looking at the correct one.

Interact with the glyph on the other side of the door to get to the next step. After revealing the Path’s End, you are then going to go to the next part of the Dungeon.
The Journey Step 4
The Pariahs stand guard over far more than just despair, for within these tunnels lie many secrets.
The fourth step takes place in the maze section of the Dungeon. There are three long passageways guarded by invulnerable Ogres. Usually, you’ll need to pick up orbs and transport them to the door of the next encounter, but not this time.

To progress the Exotic quest, you’ll need to go to the left passageway and go along the area above the glowing above below. If the ogre is going you trouble, just drop down to the ledge below. You are to look for glowing markings on the floor. Interact with them to cause a series of platforms to rise from the Abyss. Go to the third platform and pick up the orb.
The ogre might not like what you’re doing so chill for a bit behind the receptacle before proceeding onward.

Orb in hand, bunny hop your way to the far side of the right passageway where you will find a doorway. As seen above, if you see these glyphs then you’re in the right place. There are two discs on either side that you will need to light . Do so while avoiding the ogre’s eye beams. (Feel free to hide in the nearby side passage.)
Enter the doorway and the next step in the quest will begin.
The Journey Step 5
The end of your path is in sight. Defeat those who would keep you from it.
The fifth step requires you to defeat Volmar, the Tempted slain. You are so very close to the end, so take this fight with the utmost caution.
If you look on the left side of your screen, you will see an elemental buff has been activated. This is the mechanic of the fight. In the next room, Volmar will be hanging around the central platform. On the platform is an orb of Light. You are to pick up this orb and deposit it into one of the receptacles located in the corners of the arena matching the damage type. This will initiate the damage phase.

The images above match a symbol to an element. Use them as a guide in case you’re not sure which is which. You can also look around the prep room while in game. Destiny 2 is quite forgiving in that regard.
- Solar and Arc receptacles are located in the lower half of the arena.
- While the Void and Kinetic ones are located in the upper half.
You have just around 30 seconds to deal damage that corresponds to the active buff . So make sure you go into the instance with a weapon for each element. Or bring a weapon that changes elemental affinity. Also, ads will continuously appear throughout the fight. It’s a good idea to thin their numbers before depositing the orb.
It’s worth noting that Volmar is quite tanky and might require more than a few resets before the Hive Wizard goes down. The game won’t give up Xenophage that easily. But seeing as we are above 1800 in this year of Destiny 2. It shouldn’t take us more than 3-4 resets to clear the encounter.
Once Volmar dies, you’ll get a new quest item. You are now one step away from getting Xenophage.
The Journey Step 6
Return to Eris Morn with the Hive bug.

The last step in the Xenophage quest is to report back to Eris Morn back in Sanctuary. Once you’ve given her the bug, she’ll give you Xenophage in return.
Congratulations! You have just completed one of the longest active quests in Destiny 2. Pat yourself on the back and enjoy your new destructive weapon.
And that’s all the steps for getting the Xenophage machine gun in Destiny 2. It’s a bit of a long one but if you’re already familiar with the Pit of Heresy Dungeon, there’s no reason why you can’t do everything within a couple of hours. But hey, it’s all worth it for this beast of a gun. Good luck and have fun out there, Guardians.
Check out this lengthy Xenophage guide showing you step-by-step the things you need to do to get the Exotic machine gun courtesy of YouTuber TriGs .
- Login / Sign Up
Destiny 2 guide: How to get the Xenophage Exotic machine gun
It’s all about The Journey
by Austen Goslin

Destiny 2: Shadowkeep ’s Festival of the Lost has arrived, and it brought a secret Exotic quest. The weapon at the center of the quest is the Xenophage Exotic machine gun. But before you can get the gun , you’ll have to venture on a few complicated quests to find it.
Here’s how to get the Xenophage Exotic machine gun.
Note : Players are still working through this largely hidden quest. As we and the community learn more, we’ll update this guide with screenshots and tips on how to complete it.
Step 1: The Journey
This first step is all about finding the quest to get you started. The quest is hidden on the moon, inside Sorrow’s Harbor . Once you land at the harbor, enter the tower and follow the tunnels. You’ll reach a light in the middle of the cave.

Once you reach this light, walk past it and jump into the hidden hole in the wall to the right. Follow the tunnel inside the hole until you reach a platform overlooking the pyramid, with two statues on either side.

You’ll need to interact with each of the four statues .
We started with the statue closest to the entrance on the right side, then the far right statue, then the far left statue and finally the close left statue. While this code worked for us, there have been reports of several other codes on the Destiny 2 subreddit .
Once you’ve entered the code correctly, a new chest will appear on the balcony. Open the chest, and you’ll get a new quest that sends you onto the next step of the quest.

Step 2: Anchor of Light
The second step of the Xenophage quest sends you to the Anchor of Light. From there, you’ll need to find a small ball of light and use it to light some of the lecterns hidden around the area. You can see the location of the ball of light on the map below where the green arrow is on the map below.

The first lectern you’ll need to activate is right next to where the light spawns. Pick the light up, and walk it over the lectern. Here’s what the first one looks like:

All the lecterns look identical, but you’ll need to light them in a specific order. Here’s a map with the locations and orders of the lecterns:

Once you light the first one, you’ll have 60 seconds to make it to the next. This timer will reset every time you light a new lectern. Most of them are easy to find, but the fourth one could be tricky. It’s up on the third floor of the tower in the Anchor of Light.
After you light all six lecterns, you’ll get a message that says “You are ready to emerge from the dark.” Once you see that, you’ll get an objective indicator leading to the final location for this step.
Deposit the light where the game tells you to, and you’ll get the next step in the Xenophage quest.

Step 3: The four fragments
This section of the quest sends you to collect fragments from each Lost Sector on the moon. To get these fragments, you’ll need to play through the Lost Sectors just like you normally would. Once you reach the end you’ll find a puzzle along the wall near the exit of each Lost Sector.
These puzzles have a variety of symbols and you’ll need to make them all match to get the fragment.

Each one has a complicated solution, and thankfully a Discord user named “Haiku” has helpfully put them all together.

Step 4: Enter the Dungeon
For the next section of the quest, you’ll need to head into the game’s new Pit of Heresy dungeon. To get access to the dungeon talk to Eris and complete her short quest line. Once you’ve done that you’ll need to find a hidden symbol-less door inside the dungeon. The door is on a wall full of doors and symbols.

Find that specific door and interact with it and you’ll have completed this section of the quest.
Step 5: The Pariah
The next step will take you to the room near the fight with the Pariah Ogre inside the dungeon. On the cliffs near the encounter, you’ll need to drop down until you see a ledge with a small plate on it. Stand on the plate and three platforms will appear. Jump on these platforms — you can take as much time as you need, they shouldn’t disappear — and you’ll ultimately come to a light on the third platform. Grab the light and take it to a door with fire pits that you should fight in the side of on the nearby tunnels. The door should open and lead you to the final boss.
When you fight the boss you’ll be assigned a “dread.” Your dread will correspond to one of four different elements: Arc, Solar, Void, or Neutral. Once you know which dread you have you can pick up the ball at the center of the chamber and dunk it near the symbol for the dread you have. After you do this you’ll get a buff and be able to damage the boss with the elemental weapon that lines up with your dread, with Neutral being Kinetic.
Once the boss is dead you can return to Eris and she’ll give you your shiny new Xenophage.
- Destiny 2 guide
Most Popular
- Silent Hill 2 (2024) is most successful when it's doing its best Silent Hill 2 (2001) imitation
- The best sci-fi movies to watch on Netflix this August
- Dropout’s new cooking show is full of questionable culinary creations
- The animated Watchmen replicates the comics to a T — but why?
- 10 YA novels adults should read
Patch Notes
The best of Polygon in your inbox, every Friday.
This is the title for the native ad
More in Guides

The Latest ⚡️
Destiny 2 The Journey Quest Guide - Destiny 2 Xenophage Exotic
Bark at the rune... yeah, bark at the rune.
About the Author

Dillon is the Senior Game Guides Editor at Fanbyte. He's been writing about video games for 15 years and has thousands of hours logged in FFXIV and hundreds of hours in Destiny 2.
Related Posts
- Minecraft Seeds
- Minecraft Guides
- Fortnite Guides
- Roblox Guides
- GameSkinny Staff
- Terms of Service
- Privacy Policy

Destiny 2: How to Get the Xenophage Exotic Machine Gun
Xenophage is a top-tier Exotic Heavy Machine Gun and has been since its introduction in the Shadowkeep expansion. Though there are more optimal DPS choices in Destiny 2 , you’ll want to know how to get this weapon. That’s because Xenophage has high burst potential and relatively good ammo economy. Here’s how to complete The Journey Exotic quest.
How to Get the Xenophage Exotic Machine Gun in Destiny 2
To get Xenophage, you’ll need to complete an Exotic quest called The Journey . Even starting the quest is a bit complicated. We’ll go over all the steps below.
How to Start The Journey Quest in Destiny 2
To start The Journey Exotic quest, be sure that you own the Shadowkeep expansion, then head to Sorrow’s Harbor on the Moon .
Travel to the northern edge of the area and enter the Scarlet Keep, taking the leftmost doorway. Travel until you reach a light greenlit hallway, and keep an eye out for another passageway in the upper-right wall.

Jump into the passage, and follow it until you reach the chamber, where you can see the Lunar Pyramid and two Hive statues on either side.

To complete the first step of The Journey quest, activate the statues in the proper order . Approaching them will show the message, “Emerge from the Dark.”
The correct order is below. These positions assume “back” is the side closest to the Pyramid . Once correctly activated, a hidden chest will appear. Open it to start the Journey quest in earnest.
- Front right
How to Complete Emergence: The Journey Step 1
The first step of The Journey Xenophage Exotic quest is called Emergence. Head to the Anchor of Light area on the right side of the Moon . Go to the northwest portion beneath the large, multi-story Fallen structure. There’s a small room there with a fiery altar.
You’ll be lighting a total of 6 Braziers in this step. Pick up the light to activate a 60-second timer. Each Brazier you light resets the timer to 60 seconds.
Brazier Location #1

Go to the small unlit brazier on the floor nearby, and light it to refresh your timer.
Brazier Location #2

From the small room, head out and hang a left. When you see the other orange Fallen building, keep to the left. On a platform above a blue tarp-covered box is the second brazier.
Brazier Location #3

From the second brazier, turn around to the small room across from the large circular structure. The brazier is tucked into a dark corner.
Brazier Location #4

Head out the opposite opening from where you entered and go toward the multi-story Fallen building. Clamber into the support beams to find the next brazier at a vertex on the edge of the structure. You can also light this brazier from below if you’re having trouble reaching the beams themselves.
Brazier Location #5

From the Fallen building, head directly across the area to a small structure with two large generators. The next brazier is to their left.
Brazier Location #6

For the final brazier, jump on top of the large circular building. It’s at the center of the roof.
Once you’ve lit all the braziers, you have one more place to go but an infinite amount of time to get there.

From the circular building, head back toward the first and fourth brazier locations at the multi-story Fallen building. Instead of going all the way there, stop near the cliffside next to a Hive altar jutting out of the ground. Deposit the light.
How to Complete Pathfinder: The Journey Step 2

The second step of The Journey quest for the Xenophage is a bit more straightforward than the first. Your task during Pathfinder is twofold:
- Complete all four Lost Sectors on the Moon
- Solve a brief rune puzzle after the final loot chest
Complete each Lost Sector and loot the last chest to unlock the ability to complete the puzzle safely . The puzzle solutions are below, presented as positions and as numbers as you’d see on a phone. You simply shoot the runes in the following orders:
K1 Communion in Anchor of Light Rune Puzzle Solution
- 7 or Bottom left
- 9 or Bottom right
- 2 or Top middle
K1 Logistics in Archer’s Line Rune Puzzle Solution
- 1 or Top left
- 5 or Middle
- 6 or Middle right
K1 Revelation in Sorrow’s Harbor Rune Puzzle Solution
- 4 or Middle left
- 6 or Middle left
- 2 or Middle top
- 8 or Middle bottom
K1 Crew Quarters in the Hellmouth Rune Puzzle Solution
- 3 or Top right
- 8 or Bottom middle
How to Complete Descent: The Journey Step 3
Steps three, four, and five — Descent, Discovery, and Volmar, the Tempted — all take place inside the Pit of Heresy Dungeon . You’ll only need to complete one of the four main encounters in the Dungeon. We’ve covered everything you need to know about Pit of Heresy in our full walkthrough .
For step three of the Journey, Descent, complete the first encounter and proceed until you reach the wall of doors. Instead of heading down and to your right to the Ogre maze, look up and to your left.
Look for the one door without a rune above it . If you’re using the door directly in front of you as the starting point, the door you want is one level up and two columns to the left.

Platform your way to the door and head inside. There will be a Hive runestone within that you can interact with, giving you the next step in the quest, Discovery.
How to Complete Discovery: The Journey Step 4

For Discovery, head into the Ogre maze. Rather than ducking into the middle caves, keep left until you reach the cliff. Jump down onto the lower platform until you reach a plate in the ground covered in Hive runes.
Activate the plate to raise three floating platforms from the chasm, with another light ball on the final platform. Grab the light ball, head back to the main area, and go right.
Take the tunnels to the right until you begin seeing red-lit doorways flanked by braziers like the ones you lit at the beginning of The Journey quest. You’ll be able to interact with the second door; don’t worry if the prompt doesn’t populate properly. Interact with both braziers to proceed to the next step.
How to Beat Volmar, the Tempted: The Journey Step 5

Make your way through the small maze until you reach a starting area with four Hive runes in each corner . These are the four elemental Dread buffs you’ll be using in the boss fight coming up shortly.
As soon as you enter the next room, Volmar, the Tempted, will appear, a boss-level Hive Wizard that’s completely invincible at first.
You and each member of your fireteam will receive a Dread buff based on one of the four damage elements available during Shadowkeep:
- Kinetic (Neutral Dread)
- Void (Abyssal Dread)
- Arc (Thunderous Dread)
- Solar (Fiery Dread)
To damage the boss, you’ll need to collect the light ball in the center of the arena and then interact with the proper rune to activate it and be able to do damage.
- Abyssal Dread : Top left on the upper platform
- Thunderous Dread : Bottom left on the lower floor
- Fiery Dread : Top right on the lower floor
- Neutral Dread : Bottom right on the upper platform
Once you dunk the light, you can damage the boss, but only with the element noted in your Dread buff. All other elements will register as immune. Repeat this process as often as it takes to kill Volmar — and don’t die. A full team wipe (or a single death if solo) will send you back to the start of the fight .
Once Volmar dies and you progress the quest, you can leave the Pit of Heresy Dungeon. Nothing else here matters to get Xenophage.
How to Complete Finality: The Journey Step 6

All step six entails is visiting Eris Morn and picking up your reward: the Xenophage Exotic Heavy Machine Gun.
The Xenophage Machine Gun you receive won’t be a Pinnacle or Powerful drop. It will be awarded at your current Power level . You don’t have to claim it immediately unless you want to, saving it to fill in a Power gap if you’re optimizing your leveling. However, you can also always infuse it later and get the most out of the weapon as you play.
And that’s how to complete The Journey quest and get the Xenophage Exotic Machine Gun. If you’re looking for additional help with Destiny 2 ’s collection of Exotics, check out our Gjallarhorn , Unfinished Business , and Winterbite Exotic weapons guides. Our D2 guides hub has much more.
Featured image via the Destiny wiki

- Privacy Policy
- Corrections Policy
- Ethics Policy
- Fact-checking Policy
- Ownership Policy
- Looking for Eguides?

How to Complete The Journey Quest in Destiny 2
If you have the Shadowkeep Expansion, you might find yourself in possession of the coveted quest, The Journey . If you find yourself in possession of this quest and you don’t have Shadowkeep, be aware that you’ll need that expansion to finish this quest!! So, let’s get into it. Here’s how to complete The Journey quest in Destiny 2.
How to Complete the Journey Quest in Destiny 2
If you don’t have the quest yet, head first to the Moon, then to Sorrow’s Harbor. From here, you’ll want to head towards the Scarlet Keep. Once you enter it, take the first left door, and descend and keep left until you reach the Enduring Abyss . Once you hit the lantern, stop and look up to the right. There will be a lighted corridor you can jump up to.

Do so, then follow this path until you see a Pyramid. You’ll be in a small balcony area with four statues, two on the left, two on the right. By interacting with them, one or more will light up. Our goal is to light all four. This puzzle is random, so experiment by interacting with the statues until all four are lit. I found that working from the bottom left in a counter-clockwise fashion worked perfectly.
Related: How to Complete the Memory Alembic Quest in Destiny 2
Once the statues are lit, you’ll get a notification, and a chest will spawn. Open it, and you’ll get the quest, The Journey. Now, to the entrée:
Step 1: Emerged from the dark.
“Around you… darkness. If you are to discover your path, you much anchor yourself to light.”
It’d be easy to be stumped by this quest description. But it’s actually given us precisely where we need to go: the Anchor of Light . Head there from Sanctuary, then keep left until you see the bright yellow radio tower.

But we don’t want this large tower – we want the small room attached to it. Head inside, and you’ll find behind an ancient server a strange, Hive-like structure with a glowing orb within. Approach it, and it will prompt you to “Pick Up Light”. Do so, and you’ll find there’s a counter on the left side of your screen called “Torch Bearer”. You’ll have one minute to deposit the ball of light into six different locations.
This light has to be deposited in a precise order, so I really recommend finding each of the six locations and their scarlet plates beforehand. Once you have an idea of where to go, you’ll be able to complete this easily.
I’ve provided a short video of my run below (and as you can see, you can make a hiccup here or there and be perfectly fine on time). But here’s how to find each one:
Location 1 : Same Room
In the corner of the same room, you found the ball of light will be a scarlet plate. Interact with it, and your path will burn brighter.
Location 2: Within the chasm
Leave the room and keep heading straight until you see an orange wall in the distance with some Fallen graffiti. Head towards that wall and you’ll reach a stone bridge that goes over a green chasm. Turn left while on this bridge and you’ll see some broken scaffolding. Within this scaffolding is the second plate.

Location 3: Another small room
From your perch on the scaffolding, turn around until you see the saucer building. Head a little to the right of this saucer building and you’ll see a small yellow building with only one room. Behind the console in the center of this room will be another plate.

Location 4: Second floor of the radio tower
Return to the radio tower, but this time we’ll be ascending to the second floor. Once you’re on the second floor, you’ll see some crates covered with purple tarp. Jump on top of them, then look up. If you peer carefully, you’ll be able to see the dark, round shape of another plate on a girder above you. Jump up to it.

Location 5 : Cement ramp
Heading directly north of where the plate on the girder is, we’ll see another set of buildings, connected with a variety of cement ramps. Climb the highest ramp on the right side, and there will be a bowl on top.

Location 6: Saucer/Round Building
From the top of the cement ramp, head forward until you see the UFO/Saucer shaped building that was our landmark for Location 2. We want to climb on top of that. Do so, and you’ll find the plate on top.

Once you find all 6, you’ll be directed towards a steel tower. There’s no time limit for this one, and you’ll get a clear map marker for it to boot.
Step 2: Pathfinder
Okay! We have quite a few more steps to go. We’ll need to find the following fragments:
- Archer’s Line Path Fragment
- Sorrow’s Harbor Path Fragment
- Hellmouth Path Fragment
- Anchor of Light Path Fragment
For this step, we’ll need to visit all the K1 Lost Sectors. Naturally, the easiest one to go to is Anchor of Light’s Lost Sector, K1 Communion, which is North East of the UFO building.
Fragment 1: Anchor of Light, K1 Communion
Complete the Lost Sector like usual, then claim the Lost Sector chest. Jump up towards the Lost Sector exit, and you’ll find a Hive puzzle on the wall. Your goal is to make all the symbols match the symbol at the very top (which I call the ice cream cone). You do this, of course, by shooting a tile which then flips over a series of others. Here’s the easy way to do it:
- Shoot bottom left
- Shoot bottom right
- Shoot top middle
Do that, and you’ll get a grid full of ice cream cones and a hive treasure chest will spawn. Open it, and you’ll get a Path Fragment. Now, to the next lost sector.

Fragment 2: Archer’s Line, K1 Logistics
This Lost Sector is always a pain to find. Head into Archer’s Line from Sanctuary, then keeping heading straight until you reach the large building at the end of the path. Enter the building but try to keep left until you find a room full of spooky scarlet ghosts. Follow the ghosties until you descend into the Lost Sector.
Related: Destiny’s Latest Teaser Reveals New Details about the Strand Subclass
Once you’re in K1 Logistics, continue as normal and grab the Lost Sector chest. Enter the corridor after the chest to find the next puzzle. Like K1 Communion, we’re going to want to shoot some tiles and get it to match the triangle on top.
The easy solution:
- Shoot top left
- Shoot middle right
- Shoot middle center

Claim your path fragment!
Next up: Sorrow’s Harbor.
Fragment 3: Sorrow’s Harbor, K1 Revelation
Another annoying Lost Sector to track down! Use your map to get practically on top of it. Once you are, look around. The Lost Sector is inside a cave that winds beneath your feet. And if you find that the final door won’t open once you complete the Lost Sector, it’s probably because you 1) Missed an acolyte somewhere or 2) You finished the final boss too quickly and you need to leave the area slightly then come back to trigger the next few waves of grunts.
Go through the final doors and you’ll see a new puzzle. To complete it, hit the following tiles:
- Shoot middle left
- Shoot bottom middle

Yeah… that’s a lot of middle. Now, let’s head into the Hellmouth.
Fragment 4: Sorrow’s Harbor, K1 Revelation
Get into the Hellmouth whichever way you prefer, heading towards the crew community at the bottom of this section of the map. There’s nothing tricky about this Lost Sector, except you might miss the puzzle. It’s just past the Lost Sector cache on a rock balcony. Jump over to it then hit the following tiles:
- Shoot top right
- Shoot bottom middle
That’s a lot of bottoms.

… Moving right along. We finally have our last fragment, and we’re onto our next step.
Step 3: Path Uncovered
Again, we get a bit of a location-based hint. We’ll need to head to Sorrow’s Harbor and begin the Pit of Heresy , a Dungeon you can see on your map. To access this dungeon, you’ll need the Shadowkeep Expansion. If you can’t access the Pit of Heresy and you do have the Shadowkeep Expansion, check to see if you’ve completed Eris’ “The Deepening Wake Quest”.
Now that you’re in the Pit, complete the first encounter. Head forward until you hit the wall puzzle with dozens of doors.

There are two rows of lit doors. Look left. Your goal is to get to the second door from the end on the top row. Climb up there and enter the room, and you’ll find a ruin on the ground. It will have the interaction prompt “Reveal Path’s End”. Interact with it, and you’ll get a new step.
Step 4: Discovery
Welp! We’ll need to find the Pariahs, and they’re luckily right in the Pits of Heresy with us. Continue through the Dungeon as normal, heading into the terrible awful maze portion where you’ll need to avoid the Ogres. It’s important to note that you MUST NOT get to the Chamber of Suffering checkpoint, as it will lock you out of backtracking!!
Is that enough exclamation points? !!!! Here are a few extra. I’m giving these to you because I know how tedious it was to get to this point, and it’d be awful to have to complete the Dungeon or wait for reset just to finish this step.
This area is meant to trip you up, but the next set of hidden runes are hidden on a path on a ledge. Search every edge you come across, and if you see a massive set of ribs and a few scarlet ghosts, you’ll know you’re in the right place. There will be a path that will lead downward, terminating at a set of runes on the ground. And, yes, it’s beside an ogre patrol point.

Once you interact with the runes on the ground, a set of platforms will spawn. Jump across them, and you’ll see something familiar: a hive bone structure with a ball of light in the middle. But don’t worry: this time the torch buff won’t run out.
Take this ball of light all the way back where you first entered this section. There, you’ll find two scarlet plates next to a door. Light both, and the door will open. Oh, and be careful of the Ogres. They still want to kill you.
Step 5: Slay Volmar, the Tempted
The door you deposited the light into will now open. Enter and breathe a sigh of relief because the Ogres can’t follow you here. Work your way through the spiderweb-choked corridors. There, at the very end will be a Hive Wizard gold bar – Volmar the Tempted.
I’m very sorry to say that killing Volmar isn’t as easy as chucking a Nova Bomb at his head. This boss can be difficult to solo and there’s a puzzle attached. Around Volmar’s arena are a variety of Hive Ruins, each of which are connected to an element: Void, Netural, Arc, and Solar.
Related: How to Get Riptide in Destiny 2
It’s best to try and memorize where each of these Runes are. In Volmar’s room, there is a ball at the center that he guards. You’ll be given a debuff with an element associated with it. Fiery Dread for Solar, Abyssal Dread for Void, Neutral Dread for kinetic, Thunderous Dread for Arc.
You’ll need to steal the ball he’s guarding then dunk it next to the Rune that represents the element you’re being affected by. Once you’ve dunked the ball, return to Volmar to try to get in as much damage as possible.
If you’re struggling and need to recover, try to hide near the kinetic altar. If you can’t get the ball, exit the room, and get the entrance ball. And once the wizard goes down? You’ll get the next step.
Step 6: Finality
What a journey. I guess that’s why they named this quest what they did. They could have also named it “suffering” and that would have worked, too.
Now, all you need to do is return to Eris Morn in Sanctuary, and she’ll hand you the Exotic Machine Gun, Xenophage! Congratulations, Guardian.

Destiny 2 Xenophage: How to get Xenophage in Destiny 2
How to get Xenophage the Exotic machine gun in Destiny 2

The Destiny 2 Xenophage Exotic Machine Gun is a punchy weapon that you get from a pretty substantial quest on the Moon. The weapon has continually proven itself as a versatile and reliable Destiny 2 DPS option thanks to its punchy explosive rounds that virtually can't miss and good ammo reserves – take it into a Raid or Nightfall and melt bosses and Champions with it. Along with the Thunderlord Exotic Machine Gun paired with its Destiny 2 Thunderlord catalyst , Xenophage is a top-tier Exotic that's easy to use. It also has one of the best Exotic quests in the game, packed with puzzles and unique mechanics, but it's only available in the Destiny 2 Shadowkeep expansion. Everyone and their Ghost should own this thing, so here's how you can get your own Xenophage in Destiny 2.
How to start the Destiny 2 Xenophage quest

To start the quest for Xenophage, head to the Enduring Abyss area on the Moon and get ready to activate some statues. It's the area that sort of serves as Eris's base of operations near the Pyramid ship during the Shadowkeep campaign and it's where you meet her when completing her Memory quests. You can get to this area by landing at Sorrow's Harbor and heading north into the Scarlet Keep. Take the left path at the green crystal junction, then follow this path until you see a small path on the right wall leading upward. When you reach the main room, you'll find four statues along the walls - two on each side – that can be activated with the 'Emerge from the Dark' prompt. You need to activate these statues in order and withing the time limit for the Xenophage quest to begin. Oriented from the entrance to this room and looking out to the Pyramind, the order is close right, far left, far right, close left . Once all four statues are lit, a chest will spawn in the middle of the room. Loot it to claim The Journey, the first step in the Emergence Exotic quest.
1. Emerge from the dark

For the next step, you need to head to the Anchor of Light and collect a special flaming orb, using it to light six lanterns in a specific order. When you get to the Anchor of Light, hang a left toward the Fallen-infested site. The orb is in the stout building in the front. Pick it up, then go around looking for the following lanterns:
- Right next to where you picked up the orb.
- On top of a collapsed structure in the north of the area.
- In the small, yellow building next to the cliff east of where you picked up the orb.
- Within the central tower in the Moon base site where you picked up the orb.
- In the small, yellow building roughly opposite the building where lantern 3 was.
- On the roof of the round building in the middle of the Anchor of Light.
Once all six lanterns have been lit, you can dunk your orb in the small Hive spire near the site where you grabbed the orb and move on to the next Xenophage quest step.
2. Find the path fragments

Now you need to complete all four Lost Sectors on the Moon and solve Hive rune puzzles at the end of each one. Because the puzzles are in the exit paths for the Lost Sectors, you must clear out the Lost Sectors to access them. These puzzles are 3x3 grids of Hive runes where the goal is to make every rune in the grid show the same symbol as the one indicated above the grid. When you shoot a rune on the grid, it'll change what's shown on a particular set of runes, so you need to shoot the right combination of runes to change them all to be the same. Once you've done this, a chest containing a path fragment will spawn. To keep things simple, we've coded our solutions like a keypad as seen above. Here's how to complete the puzzles for each Lost Sector. Shoot the designated runes in the following order:
- K1 Logistics: 1 - 7 - 6 - 5
- K1 Revelation: 6 - 4 - 5 - 5 - 4 - 8 - 5 - 2
- K1 Crew Quarters: 3 - 4 - 5 - 8 - 9 - 9 - 8 - 8
- K1 Communion: 7 - 9 - 2 - 2
3. Uncover the path in the Pit of Heresy Dungeon

The next three steps take place in the Pit of Heresy Dungeon. Right after the first encounter in the Necropolis, you'll reach a wall full of dark doorways. Look for a doorway without a chained rune hanging over it on the upper-left side. Use the pillars along the back to scale the wall and jump over to the door, then activate the rune inside for the next step.
4. Locate the path's end

The rest of the Destiny 2 Xenophage quest takes place in the Hive Ogre labyrinth section of the Dungeon known as the Pit. When you first enter the room, note the left and right hallways. In short, you need to take the left hallway to collect the same type of orb that we used to light the lanterns earlier, then take it to the right hallway to light more lanterns. Here's what to do:
- Head down the left hallway and drop down to the ledge on the cliffside.
- Look for a small plate with some runes scrawled on it and activate it to summon a string of platforms nearby.

- Hop across the platform, grab the orb from the final platform, and then jump back the way you came.
- Return to the rightmost hallway with the orb.
- Hug the right wall until you reach a locked red door with two lanterns next to it . Avoid the Ogres as necessary too.
- Use your orb to light both lanterns, thus opening the door . Head inside and follow the linear path deeper to reach the final encounter.

5. Slay Volmar, the Tempted

Boss time! Volmar isn't a tough-as-nails boss, but coming prepared will help you get through the fight quickly and easily. This special Wizard boss combines all the quest mechanics we've used thus far. On top of managing enemies, you'll need to collect and deposit flaming orbs in specific locations to acquire buffs which let you damage the boss.
Before the boss, you'll come to a room with four elemental orbs. There will be one in each corner, with each orb marked by a Hive rune. The Void orb has an A-looking rune, the Arc orb has a V-looking rune, the Solar orb has a W-looking rune, and the Kinetic orb has an I-looking rune. This information is essential to the boss fight because it indicates where you need to deposit the flaming orbs based on the buff that you have.
Throughout the fight, you'll receive one of four buffs: Abyssal (Void), Thunderous (Arc), Fiery (Solar), or Neutral (Kinetic) Dread. When you have a Dread active, you'll need to collect an orb of flame from the center of the arena and deposit it in the corresponding corner of the room. Here's where to deposit orbs based on your Dread type (oriented to the arena's entrance):
- Abyssal Dread: top level, back-left corner
- Neutral Dread: top level, front-right corner
- Thunderous Dread: bottom level, front left corner
- Fiery Dread: bottom level, back right corner
When you deposit an orb in the correct spot, your Dread will turn into a Vengeance buff that lasts around 25 seconds. This buff allows you to damage the boss, but only using the damage type of your buff. So if you turn Abyssal Dread into Abyssal Vengeance, you'll be able to damage the boss using Void weapons and abilities. Keep this in mind when planning your loadout. Be sure to use different elements for your energy and heavy weapons, that way you can deal damage using multiple Vengeance types.
Repeat this orb-dunking process until the boss is dead. You'll receive a Hive bug which you must then bring to Eris in Sanctuary on the Moon. Congratulations! Xenophage is yours. Go shoot some dudes with your freaking anti-materiel rifle.
© GamesRadar+. Not to be reproduced without permission.
Sign up to the GamesRadar+ Newsletter
Weekly digests, tales from the communities you love, and more
Austin freelanced for the likes of PC Gamer, Eurogamer, IGN, Sports Illustrated, and more while finishing his journalism degree, and he's been with GamesRadar+ since 2019. They've yet to realize that his position as a senior writer is just a cover up for his career-spanning Destiny column, and he's kept the ruse going with a focus on news and the occasional feature, all while playing as many roguelikes as possible.
- Will Sawyer Guides Writer
Hunt: Showdown's Steam reviews take a battering after the colossal 1896 update brings dreary UI and stuttering to the gothic PvPvE shooter
As Activision suddenly kills a long-awaited Call of Duty mod, Infinity Ward veteran encourages the publisher to "build systems to help your UGC community, not strangle it"
"We're brothers": Dishonored and Prey director reflects on 20 years at Arkane as he unveils his new RPG-infused immersive sim
Most Popular
- 2 Black Myth: Wukong review – "A great action RPG that feels like God of War for Chinese mythology"
- 3 Dustborn review: "Almost lives up to its promise as an epic, political road trip saga"
- 4 Wyrmspan review: "Ramps up the complexity, but not the interactivity"
- 5 Stormgate review: "A little messy and a little too complicated"
- 2 The Union review: "Halle Berry and Mark Wahlberg elevate a nonsensical Netflix action caper"
- 3 Alien: Romulus review – "Full of shocks and suspense but sometimes over-burdened"
- 4 Blink Twice review: "Zoë Kravitz makes a phenomenal directorial debut with this gripping thriller"
- 5 Jackpot! review: "John Cena is a joy to watch but his latest isn't quite on the money"
- 2 House of the Dragon season 2 episode 8 review: "Excellent sequences can’t save a finale that’s all set-up and no conclusion"
- 3 Batman: Caped Crusader review: "A reinvention of a classic"
- 4 House of the Dragon season 2 episode 7 review: "Brutal, bloody spectacle and a chills-inducing ending, but a victim of the season's odd pacing"
- 5 House of the Dragon season 2 episode 6 review: "More dragons and great performances bring new energy"
- Entertainment
- PlayStation
- Elden Ring Guides
- Roblox Codes
- Pokemon Legends Arceus
- Privacy Policy
- Terms of Use

Destiny 2 Xenophage Exotic Quest Pathfinder – Lost Sector Puzzle Solutions
The Xenophage Exotic Quest for Destiny 2 has numerous parts of the quest that must be solved to progress. Much like the other exotic quests in the game you’ll be following numerous clues to try and track down new quests steps that get you closer and closer to the final reward of the Xenophage Exotic Machine Gun.
The Pathfinder leg of the Xenophage Quest has you collecting Path fragments by visiting each of the Lost Sectors on the Moon. Upon completing each Lost Sector you will find that there is a puzzle that you can solve. This guide will explain how to collect each path fragment from each Lost Sector.
Each puzzle can be solved by shooting the stones on the wall. Shooting the stones will change the symbols. The idea is to get the symbols to all match the one at the top of the puzzle. If you don’t touch the puzzles at all you can use the sequences below to unlock the path fragments.
Archer’s Line – K1 Logistics
Top Left > Bottom Left > Middle Right > Middle
Sorrow’s Harbor – K1 Revelation
Middle Right > Middle Left > Middle > Middle > Middle Left > Top Middle > Bottom Middle > Middle
Hellmouth – K1 Crew Quarters
Top Right > Middle Left > Middle > Bottom Middle > Bottom Right > Bottom Right > Bottom Middle > Bottom Middle
Anchor of Light – K1 Communion
Bottom Left > Bottom Right > Middle Top > Middle Top >
Lost Sector Puzzle Solutions Video

Home > Game Guides
- Game Guides
Destiny 2: Shadowkeep The Journey Guide
by enricofairme · Published October 29, 2019 5:50 PM · Updated October 29, 2019 7:44 PM

In Destiny 2 there is an Exotic Quest called The Journey. This Exotic Quest takes you around the Moon as you attempt to find the Exotic weapon. To help you complete this quest, use our The Journey Guide.
Note : Guide is still updating.
Reaching Enduring Abyss
To start you want to make your way to the area you meet Eris Morn overlooking the Pyramid. This area is in Enduring Abyss which can be accessed through a Memory portal, or by travelling through Sorrow’s Harbor to the Scarlet Keep. The portal way is rather straightforward, but requires having a Memory quest to turn in.

If you don’t have a Memory quest to turn in, fast travel to Sorrow’s Harbor and make your way inside the Scarlet Keep (located in the north). Inside the keep head forward until you see some glowing green rocks. Take a left here and head forward through the hallway.

As you walk through the hallway you will reach a new area called Enduring Abyss. After the text for this area walk forward until you need to drop down. Don’t drop down. Instead look along the right wall for a hole. Jump to the hole then walk through the corridor to reach the area overlooking the Pyramid.
Interact With the Four Statues to Get Quest

In the area overlooking the Pyramid you will find four statues. Go up to each statue and interact with it (“emerge from the dark”). Once you’ve done this with all four statues a chest will appear. Interact with the chest to receive the quest step Emergence, which is part of The Journey Exotic Quest.
Emergence: Anchor of Light
Once you have the Quest make your way to the Anchor of Light area. I found the the video from YouTuber Spider above to be useful in guiding you where you need to go. To complete this portion of the Exotic Quest you need to pick up a light source then light torches in a specific sequence. Once you’ve lit all the torches you will earn the Pathfinder mission step.
Pathfinder: Find the Path Fragments
The Pathfinder mission step is split into four objectives. You need to find Path Fragments in Anchor of Light, Sorrow’s Harbor, Hellmouth, and Archer’s Line. All of the Path Fragments can be found in the exits of each areas Lost Sector so you will need to complete each one. To help you find the exact locations, consult the the more indepth locations below.
Anchor of Light Path Fragment

Go to the Lost Sector in Anchor of Light. Make your way through the Lost Sector and exit via the door next to the Chest (elevated above the chest ledge). Go up the stairs and you will see some symbols on the wall in front of you. To solve this puzzle complete match all nine symbols to the one show on top of the puzzle. You can change the symbol by shooting. Once you match the symbols a chest appears with the Path Fragment inside it.
Solution (Puzzle Spawn) : Bottom Left, Bottom Right, 2x Top Middle.
Sorrow’s Harbor Path Fragment

Go to the Lost Sector in Sorrow’s Harbor. Make your way through the Lost Sector and exit via the door next to the Chest (on the catwalk by the Chest). Go up the stairs and you will see some symbols on the wall to the right of you. To solve this puzzle complete match all nine symbols to the one show on top of the puzzle. You can change the symbol by shooting. Once you match the symbols a chest appears with the Path Fragment inside it.
Solution (Puzzle Spawn) : Right Middle, Left Middle, 2x Middle, Left Middle, Top Middle, Bottom Middle, Middle.
Hellmouth Path Fragment

Go to the Lost Sector in Hellmouth. Make your way through the Lost Sector and exit using the stone platform near the Chest. On this stone platform is the puzzle. To solve this puzzle complete match all nine symbols to the one show on top of the puzzle. You can change the symbol by shooting. Once you match the symbols a chest appears with the Path Fragment inside it.
Solution (Puzzle Spawn) : Top Right, Left Middle, Middle, Bottom Middle, 2x Right Bottom, 2x Bottom Middle.
Archer’s Landing Path Fragment

Go to the Lost Sector in Archer’s Landing. Make your way through the Lost Sector and exit using the building behind the chest that opens when you defeat the boss. On your way out of this building you will see the puzzle on the wall to your right. To solve this puzzle complete match all nine symbols to the one show on top of the puzzle. You can change the symbol by shooting. Once you match the symbols a chest appears with the Path Fragment inside it.
Solution (Puzzle Spawn) : Top Left, Bottom Left, Middle, Middle Right.
Once you’ve collected all the Path Fragments from the puzzles above you will unlock the Descent objective. This objective takes you to into the Dungeon on the Moon.
Path Uncovered: Pit of Heresy
For this next portion of the quest make your way into the Pit of Heresy Dungeon. In this Dungeon you want to complete the first encounter. You then need to find a hidden pathway. Use the video by WoW Quests above to find the exact location. You will probably need a second or even third to get this far in the Dungeon. Once you reveal Path’s End you unlock the Discovery quest step.
Thoughts on our The Journey Guide? Drop a comment in The Pit below.
Tags: Destiny 2 Destiny 2: Shadowkeep

enricofairme
A lifelong gamer who has devoted the last six years to the creation and development of "Hold To Reset," a website tailored by gamers for gamers. Yell your hot takes at him on X .
3 responses
- Pingbacks 0
Had to leave the quest at step 4. Quest card shows i am on step 4. How do i get back in to start at 4 and not do all of pit of heresy again? This is the exotic quest the journey.
How do you reset the puzzle? I started the puzzle before I saw the walkthrough.
easy just reset the hidden sector and you’ll reset the puzzle
Leave a Reply Cancel reply
Your email address will not be published. Required fields are marked *
Save my name, email, and website in this browser for the next time I comment.
This site uses Akismet to reduce spam. Learn how your comment data is processed .
- Vampire Survivors Darkana Guide
- Vampire Survivors The Darkasso Guide
- GTA Online LS Tags Explained
- GTA Online Pizza Delivery Activity Explainer
- GTA Online Madrazo Hits Explained

Creating Your Ultimate Peru Travel Plan: A Step-by-Step Guide for Your Journey
I magine this: You’re standing on top of an ancient mountain city, lost in the clouds. The air is thin, but the view is amazing! All around you are crumbling stone buildings built by an empire that ruled long ago. This is Peru , a country in South America that’s full of surprises. Whether you’re into history, nature, or trying new things, Peru has something incredible waiting for you. But to have the BEST trip possible, you need a plan. That’s where this guide comes in! Let’s get started creating your ultimate Peru travel adventure.
Step 1: Dream and Discover
Peru is like a treasure chest waiting to be explored. It’s a land where amazing adventures and ancient secrets come together. To make your Peruvian trip the best it can be, let’s start by dreaming a little and figuring out what makes this country so special.
Famous Wonders
- Machu Picchu stands as a testament to the Incan empire, hidden high in the Andes, waiting for you to explore its stone pathways and stunning views.
- Nazca Lines, those mysterious drawings in the desert. They are so huge that you can only see them from the sky. They’re a puzzle from the past that has to be seen to be believed.
- Cusco is the heart of it all, a city where ancient ruins meet colonial architecture, and every corner has a story to tell.
Step 2: Deciding When to Go
Peru’s weather changes a lot depending on where you are in the country. The coast is hot and dry, while the mountains are cool and can get rainy. The jungle is hot and humid! The best time to visit depends on what you want to do:
- Dry Season (May-October): This is the most popular time to visit , with sunny skies and clear trails for hiking and exploring ruins. But, it also gets pretty crowded with tourists.
- Wet Season (November-April): There’s a chance of rain, but the landscapes are super green, and there are fewer crowds. This can be a great time to visit for a more peaceful trip.
- Festival Time: Peru has tons of cool festivals throughout the year. If you love celebrations, look into timing your trip to catch ones that sound interesting to you!
Step 3: Book Your Private Tour
When booking your trip, going for a private tour can make your experience special. With a private tour, you get a trip that’s made just for you. You can pick what you want to see and when you want to see it.
When planning your private tour, there are some places you just can't miss. One of these is the Nazca Lines. Booking Nazca lines private tours lets you see these ancient mysteries up close in a way that suits you. With your guide to show you around, you can learn a lot more about the place.
And don't forget to know what’s included in the tour price, like hotel pick-up and drop-off or entrance fees. This knowledge ensures a smooth journey, allowing you to enjoy your adventure fully.
Step 4: Gather Essential Travel Documents
Before you pack your bags for an adventure in Peru , there are a few important pieces of paper you’ll need to sort out. First off, your passport is your golden ticket. Make sure it’s valid for at least six months beyond your planned return date. Some countries are strict about this rule.
Now, let’s talk about visas and your ultimate Peru travel adventure. Whether you need one depends on where you’re from. Many travelers can enter Peru without a visa for short visits, usually up to 90 days. But it’s always a good idea to check the latest visa requirements for your country.
Other documents you might need include travel insurance paperwork, vaccination certificates, and driver’s licenses, especially if you plan on renting a vehicle.
Step 5: Packing Essentials and Tips
Packing for Peru is an exciting part of preparing for your journey, given the country’s diverse climates and the range of activities you might engage in.
So, start with essentials like lightweight, breathable clothing that you can layer. This way, you’re prepared for both warm days and cooler evenings. Don’t forget a good pair of walking shoes for those treks and city explorations.
Including a waterproof jacket in your bag is a smart move, as rain can surprise you, particularly in the Amazon. And if you are planning to explore the ancient ruins or go on hikes, a sturdy backpack is a must.
Wrapping It All
Finally, Peru is a country that sticks with you long after you leave. It’s a place of incredible beauty, rich history, and the warmest people. With a little planning, your trip to Peru will be an adventure you’ll never forget. So, what are you waiting for? Start planning your ultimate Peru travel adventure, start packing, and get ready for the journey of a lifetime!
The post Creating Your Ultimate Peru Travel Plan: A Step-by-Step Guide for Your Journey appeared first on Malorie's Adventures .

- Membership Membership Overview Become a Member Renew Membership Membership FAQ About AARC Leadership and Governance Leadership Grand Rounds AARC Election 2025
- Community AARConnect Specialty Sections State Societies Awards and Recognition AARC Disaster Relief Fund
Become a Member

Visit AARC Connect
- Learn About RT What is an RT? Why Be an RT?
- Students Student Membership Benefits Find a School Scholarship and Loans Online Learning for Students Exam Prep Understanding Credentials
- Career & Advancement Career Advice Practice vs. Practive Find a Job Advancement Opportunities RT Degree Advancement Advanced Practice RT
- Online Education AARC University Webcasts and Journalcasts CRCE Transcripts CRCE Accreditation AARC Explores
- Resources Respiratory Care Resource Center For Educators Clinical Practice Guidelines Coding and Billing Instructions Clinical PEP Safe and Effective Staffing Guide
AARC University
Visit resource center.
- Events AARC Congress AARC Summer Forum
- Programs Respiratory Care Week Corporate Partners Emerging Leaders Advertising and Sponsorship Opportunities Industry Advisory Council HOSA — Future Health Professionals Sputum Bowl
AARC Congress
Corporate partners.
- AARC Pact Federal Government Affairs and Advocacy State Advocacy AARC Advocacy and Government Affairs Committee AARC Annual Respiratory Care Fly-In Washington, D.C. Model Practice Act
View Current Priorities
Take action.
- Newsroom Podcasts Respiratory Care Fast Track and Open Access Respiratory Care Education Annual AARC Museum Good Press Submission Form
View Respiratory Care
Visit the aarc museum.
Advertisement

Your RT Career
Learn About RT
Career & Advancement
Education & Resources
Online Education
Events & Programs
News & publications.
RT Researchers Part 2: Where You Work Matters

By Debbie Bunch
Aug. 19, 2024
Getting involved in clinical research often depends on the value that your organization places on conducting studies. Community hospitals and smaller facilities generally don’t have budgets for research, nor do they typically have physicians on staff who can champion the research cause.
If research is something you are interested in pursuing, hiring on at a larger hospital — and ideally one that is associated with a medical school — can greatly increase your chances of success.
In Part 2 of our series, four therapists who work at these types of facilities share their stories.
Research is expected
Robert B. Johnson, MS, RRT, senior director of respiratory care, bronchoscopy, and PFTs at the University of Alabama Birmingham (UAB) Hospital in Birmingham, says research is an expectation for RTs at his facility.
“Because UAB Hospital is an academic medical center, research is part of all RTs’ jobs,” he explained. That can mean anything from small research projects submitted for presentation at the Open Forum at the AARC Congress to larger studies where he is contacted by principal investigators from other academic medical centers or industry to see if UAB RTs can help.
“Most of the time we say yes,” said Johnson. “For example, in the last year there were two articles — PREOXI and DEVICE — that appeared in The New England Journal of Medicine about studies that the RT department had taken part in. It is also very nice when they name some of the RTs as co-investigators.”
In the past year, the UAB RT department has started an RT research program as well to more formally encourage RTs to take part in research. “Our first group had 12 RTs,” said Johnson. “They all completed their Institutional Review Board (IRB) training and hospital-based research classes.” These therapists now work some days at the bedside and other days as researchers where they screen new patients in the ICUs for inclusion/exclusion into ongoing studies.
Johnson says this immersion into research at UAB has led to research careers for several former department employees. “At any given time, there are eight to ten RTs that have left the UAB RT department to work as fulltime researchers in different parts of the university,” he said.
Advantages are many
Keith D. Lamb, RRT, RRT-ACCS, FAARC, FCCM, an RT at the University of Virginia Medical Center in Charlottesville, and Michael Meska, MHA, RRT, RRT-ACCS, RRT-NPS, FACHE, regional director of respiratory care, neurodiagnostics, and sleep at Indiana University Health-South Central Region in Indiana, have capitalized on the reputations of their facilities to conduct studies too.
Lamb got involved in research in earnest when he served as a clinical research coordinator at another large, tertiary referral center and level one trauma center. During his time there he participated in international observational trials, including LungSafe, local performance improvement projects, and everything in between.
“I have served as principal investigator on several projects and co-investigator on others,” he said. “I have also served as a ‘data miner’ or chart reviewer, lead author, and co-author.”
Lamb sees many advantages to research involvement. “My benefit from working on these projects is multifold. I get to be part of a bigger picture where our data may be used to further other investigators’ research, or I might be able to use the local data we generate to improve the quality of care provided at my own institution,” he said. “The LungSafe Trial has been used as a leapfrog for dozens of other ARDS investigations and many of my QI/QA research projects have been used to change protocols or guidelines.”
He has published in numerous top-tier peer reviewed journals, including Respiratory Care and the Canadian Journal of Respiratory Therapy , and he may soon have other publications to add to the list. “I am currently in the planning stages of a couple of different projects,” said Lamb. “I also have a couple of manuscripts under review. I can’t see myself completely disengaging from research. It is one of the most important things as a professional we can get involved in.”
Meska says his team pursued its inaugural IRB approval for a study examining COPD and elements from the GOLD report. “We observed a potential gap in care from those elements in GOLD,” he said. “The hope was to review our findings, close any care gaps, and translate our findings into local changes.”
He served as the investigator on the study along with two colleagues he calls “amazing.” “I could not have done the study myself,” he said. “Our medical director support was also important — we checked in and shared findings on nearly an ongoing basis.”
Meska and his fellow investigators have now synthesized their findings and are actively examining a pulmonary navigator role to close the gaps identified by the research. They plan to present their findings at the AARC Congress this November.
For him, the biggest learning curve in conducting the study was gaining knowledge of the IRB process, but now that he understands how that works, he definitely plans to get his therapists involved in additional studies. “We are pursuing studies that are even more powerful about COPD and care rendered to these patients,” he said.
Answering a call
Jonathan Vono, MBA, RRT, clinical manager of critical care support services/respiratory therapy at Henry Ford Hospital in Detroit, MI, says his foray into research came when he was approached by the radiation oncology team at his hospital to assist with a study that ended up being titled “Application of Continuous Positive Airway Pressure for Thoracic Respiratory Motion Management: An Assessment in a Magnetic Resonance Imaging-Guided Radiation Therapy Environment” when it was published in Advances in Radiation Oncology in 2022.
“I set up the CPAP pressures study protocol, built the circuit to be used, and assisted with testing delivered pressures and testing of safe distance function of the device during MRI imaging,” he explained. Vono was a co-author on the final paper, which garnered recognition from other health care teams regarding the role RTs can play in the research setting.
He believes research — and especially the publication of research — can help boost the profession in many ways. “This recognition is needed as we, as a profession, struggle to promote ourselves,” said Vono. “COVID did a lot to get our name out there, but if we don’t keep the iron hot, so to speak, people will forget who we are and all we have to offer.”
Major upsides
The bottom line is, if your hospital prides itself on clinical investigation, there is a role for you to play in conducting studies. And the more studies you get involved in, the bigger the upside for your facility and for your profession.
In the final article in this series, we will take a closer look at how educators are getting involved in research as well, both on their own and as mentors to their students.
Career Development
Get Newsroom in your mailbox
Member In News
Members in the News | In-home Respiratory and Mobility Service Gets a New Location

Engaging Stories
Chloe Murillos Showcases Passion for Profession

Members in the News | RT Staffing Shortages and Free Diving Discussed
Featured Buzz
Featured Buzz Aug. 12

The Next Step of Your Respiratory Therapist Journey Begins Now
The AARC can help you discover your unique path and connect you with thousands of other dedicated RTs.
IMAGES
COMMENTS
Destiny 2 will add yet another Exotic quest to the mix next week, allowing players the chance to nab the Xenophage Exotic Machine Gun.. Step 1: Begin The Journey. You'll need to head to Eris' little hideout inside Sorrow's Harbour to start this quest. To get there, spawn at Sorrow's Harbour and head up towards the large set of stairs, taking the door on the left.
Step 1: Emerge from the Darkness. After you have successfully begun your quest, fast-travel to the Sanctuary transmat location on The Moon, mount your Sparrow, and immediately head down the right path toward Anchor of Light. Once you reach Anchor of Light, head left toward the Fallen outpost built on the cliffside.
Here's a quick rundown of the steps needed to obtain Xenophage : Interact with the statues near the Pyramid to start the quest. Light the six plates in Anchor of Light. Complete the four puzzles ...
Step 1: Go to the Enduring Abyss. To get The Journey quest for Xenophage, you will need to reach the Enduring Abyss area beneath the Moon. Begin by loading in at the Sanctuary fast-travel point on ...
Destiny 2 The Journey Exotic Quest Full Guide - Xenophage Exotic Machine Gun - Step by Step GuideThis guide shows you the Journey exotic quest in Destiny 2. ...
K1 Crew: 9, 4, 5, 2, 3, 3, 2 After completing all four of the puzzles and obtain four map fragments, you will unlock the next step in unlocking Xenophage. Step 4: Journey to the Depths
Complete Guide for "The Journey" Exotic Quest to get the new Xenophage Exotic Machine Gun in the Shadowkeep DLC (Season of the undying)!→ COMPLETE GARDEN OF ...
Here's how to complete The Journey Emergence "Emerged from the Dark" quest step in Destiny 2. This is the second step in the Xenophage Exotic Quest. All step...
The first step, Emergence, talks a lot about Crota, but this is a bit of a red herring. You need to head to the Anchor of Light, to light some Lecterns. Destiny 2 - The Journey - How To Emerge ...
The Journey Quest Steps. There are 6 steps to this Destiny 2 Exotic quest. They will take you all over the Moon and several of the steps will take you through the depths of the Pit of Heresy Dungeon. The Journey Step 1. Around you… darkness. If you are to discover your path, you much anchor yourself to light.
Step 1: The Journey. This first step is all about finding the quest to get you started. The quest is hidden on the moon, inside Sorrow's Harbor. Once you land at the harbor, enter the tower and ...
Error: Failed to execute 'querySelectorAll' on 'Element': 'img:not (a img, .tierlist-item-image, .gallery-image, .chip-image, div.modal-body img)' is not a valid selector. Looking for the new Destiny 2 Xenophage Exotic? You'll need to complete a quest called The Journey from Eris!
You need to interact with a flower sort of thing to start the process: it's right next to the first brazier, inside a building and on the back of a post. Interacting with the first brazier will ...
1. The Journey. Around you… darkness. If you are to discover your path, you must anchor yourself to light. 2. The Journey. A light shines on your path. But you have yet to bring it into focus. Until then, your path remains among the lost.
How to Complete Emergence: The Journey Step 1. The first step of The Journey Xenophage Exotic quest is called Emergence. Head to the Anchor of Light area on the right side of the Moon. Go to the northwest portion beneath the large, multi-story Fallen structure. There's a small room there with a fiery altar.
Once the statues are lit, you'll get a notification, and a chest will spawn. Open it, and you'll get the quest, The Journey. Now, to the entrée: Step 1: Emerged from the dark. "Around you… darkness. If you are to discover your path, you much anchor yourself to light.".
The Destiny 2 Xenophage Exotic Machine Gun is a punchy weapon that you get from a pretty substantial quest on the Moon. ... Loot it to claim The Journey, the first step in the Emergence Exotic ...
The Xenophage Exotic Quest for Destiny 2 has numerous parts of the quest that must be solved to progress. Much like the other exotic quests in the game you'll be following numerous clues to try and track down new quests steps that get you closer and closer to the final reward of the Xenophage Exotic Machine Gun.
In Destiny 2 there is an Exotic Quest called The Journey. This Exotic Quest takes you around the Moon as you attempt to find the Exotic weapon. To help you complete this quest, use our The Journey Guide. Note: Guide is still updating. Reaching Enduring Abyss. To start you want to make your way to the area you meet Eris Morn overlooking the Pyramid.
Hey guys here's a guide for the 3rd quest step for Xenophage. How to complete all puzzlesHeres the number sequences I used:Anchor of Light - 79255525 Archers...
"A journey of a thousand miles begins with a single step" is a common saying that originated from a Chinese proverb. The quotation is from Chapter 64 of the Tao Te Ching ascribed to Laozi, [1] although it is also erroneously ascribed to his contemporary Confucius. [2] This saying teaches that even the longest and most difficult ventures have a starting point; something which begins with one ...
232 likes, 0 comments - jspidersrajajinagar_ on August 19, 2024: "Reflecting student journey and the lessons learned in the classroom. Every step brings me closer to my dreams. . . . . . . . . . #studentlife #learningjourney #classroomstories #education #motivation #dreambig #inspiration".
The post Creating Your Ultimate Peru Travel Plan: A Step-by-Step Guide for Your Journey appeared first on Malorie's Adventures. Malorie's Adventures. Creating Your Ultimate Peru Travel Plan: A ...
The Next Step of Your Respiratory Therapist Journey Begins Now. The AARC can help you discover your unique path and connect you with thousands of other dedicated RTs. Learn More About Membership. American Association for Respiratory Care. 9425 N. MacArthur Blvd Suite 100 Irving, TX 75063-4706. Contact Us
Step 6: Understanding That It's A Journey. Shifting your processes and culture to data-first will take time, effort, budgets and learning from failure. Focus your team on the benefits a data-first ...
Here's is the location of "The Journey - Descent" quest step "Path Uncovered". To get to it, you must complete the first encounter of the "Pit of Heresy" as ...
STEP 2: Login with Mendeley Logged in Success Create a Mendeley account. Please note: If you switch to a different device, you may be asked to login again with only your ACS ID. ... The Intriguing Journey of a Key Epitranscriptomic Player Becoming an Emerging Biological Target. Click to copy article link Article link copied! Simona Barone ...
Here's is the location of "The Journey - Discovery" quest step "Path's End Located". To get to it, you must complete the first encounter of the "Pit of Heres...
It is essential that the transport of the vaccines and cold chain is facilitated at every step of the journey to ensure their timely reception, clearance and ultimately delivery in time for the campaign. Detailed plans to support vaccinators and social mobilizers to reach eligible children across the Gaza Strip have been finalized. Vaccination ...