Industrial Park
Hatari reef, the journey down chapter 2.
Game Details: Adventure, 2014
Links: Moby Games , Steam , Adventure Gamers
Walkthrough Updated: 8/19/2018
Suggested Listening: Give Up Now ( Ash 25 )
Talk to Joe and Lina, then go down to the right and talk to Kito. Take the screwdriver from the toolbox and the duct tape hanging from the chair. Use the screwdriver to remove the compass from the dashboard. Return up to the deck and give the compass to Joe - now you need a map. Look at the sign on the ship to see it is named Biko. Touch the wires, then repair them with the duct tape. Go through the door to the cabin and press the button to turn on the lights. Talk to Gimbo. Take the spring, then examine the sink on the left.
Go back outside, then climb the steps. Examine the door and the porthole, then use your screwdriver on the porthole to remove the glass. Now use your spring to get the key and unlock the door with it. Search the drawer to get a navigation book (which will be very handy throughout the rest of the game). Go back to Joe and show him this book.
Talk to Kito 3 times and you will be free. Pick up the ball and chain from the right, then use it on the window. Use it again 3 times to make a hole in the wall, then head through. Look at the carts to see that there is a pickaxe in the bottom left one, but you can't reach it. Try using the lever on the right - you need to prop it somehow. Return to the cell and examine the skeleton to get its hand. Go back out to the prison yard and use the skeleton hand on the lever. Now you need to move the carts around using the buttons:
- Press the button on the right wall to adjust the gear
- Press the left of the bank of 3 buttons - this will move the pickaxe to the top rail
- Press the button on the right wall twice
- Press the right of the bank of 3 buttons - this will move the empty cart to the bottom rail
- Press the button on the right wall twice more
- Press the middle of the bank of 3 buttons - this will move the pickaxe to the right rail
Now you can take the pickaxe from the cart. Return to the cell and use the pickaxe on Kito's chains. Use it again on the grate in the floor, then climb down.
Search the dumpster to get a can of lobster. Leave the alley and you will end up with a matchbook. Examine the newspaper rack several times, then break it with your pickaxe and take some newspapers. Go left, then to the end of the road to see the Biko. Continue into the dark alley in the corner and take a packet of nachos from the crate. Talk to Moe and Vince about everything. Put your newspapers in the barrel, then light them with your match. Talk to Moe again and you will get some new clothes.
Leave the alley and go to the lighthouse to the far left. Head inside and talk to Morten about everything. Pick up the boltcutters from the floor, and take the model ship from over the fireplace. Return to the main street of town and go up the steps to the Maitre D. Talk to him, but he won't let you inside. Use your pickaxe on the wire box just to the right of the steps, then use your boltcutters on the wires inside. Talk to the Maitre D again, who is still unhelpful and mentions he is not aware of a repairman coming to fix the lights. Go to the right and examine the matchbook in your inventory to see a phone number. Use the phone booth and dial 634-000, saying that you are management. Return to the Maitre D and you will end up with the lamp.
Return to the alley where you started this section, by going left from the phone booth. Enter Arnie's and talk to the guys at the table, then to the bartender. Examine the almanac on the wall and you will take it. Examine the radio and see that it is tuned to 96.9, then head outside again. Go back to the lighthouse and head up the stairs. Examine the radio to see it is transmitting at 96.9. Use your lamp on the broken lantern up here, and the lighthouse will be shining again. Go back down the stairs and Morten will tell you he still needs blueprints. Use your can on the teapot over the fire. Return to Arnie's and give the can to Gimbo. Go to the lighthouse again and give the navigation book to Morten - the lighthouse is working again. Go to Arnie's to find that the bartender is left. Climb into the food shaft.
Examine the back door of the club, then talk to the sailor. Enter Arnie's and talk to the bartender, then examine the sleeping sailors and pick up the empty bottle. Leave the alley, then enter the building across the street. Talk to Andiswa, who is the Mayor's secretary. Look at the map on the wall and examine all of the locations on it. Head out to the lighthouse and talk to Morten about everything. Return to Andiswa and talk to her again, then give her the almanac. Use her terminal and search for "expedition" to learn about the former chief of police, Leroy McIgbo. Use the phone booth out on the street, and examine the phone book. Search for McIgbo, then dial 510-842.
After the conversation, look at the fancy car here, then go left. Go over to the taxi driver and talk to Reynolds. Look at the ticket booth, then return right and go to the end of the street - the Biko has now left. Deflate the rubber boat and take it with you. Go back to the fancy car and use the rubber boat on it. Enter the Mayor's office on the right and try to take the fire extinguisher, but it is locked in position. Use your matchbook on the alarm to the right of the window, then take the fire extinguisher. Now go outside and use the fire extinguisher on the rubber boat. Take a wheel from the car, then go and give it to Reynolds.
Look at the locked door on the right, then at the window above. Examine the tow truck to see the key is missing. Use your boltcutters on the gate straight ahead, then open it and go through. Examine the power box and set each knob to the position that gives maximum power:
- Top left: Pointing down
- Top right: Pointing left
- Bottom left: Pointing right
- Bottom right: Pointing up-left
Now press the small button beneath the meter and power will be restored to the mill. Use the control panel and watch what happens with the large crane arm. Look in the key box and you will take some keys. Go outside and use these on the truck to release the police car. Back inside again, use the control panel once more. Turn the hand-wheel on the left, before using the control panel again. Climb up the steps on the right.
In the office, search all 12 of the drawers until the safe is revealed. Try pressing the buttons in a game of Mastermind, until you work out the correct combination is 4571.
Enter Arnie's bar and talk to the bartender and the sad sailor. Go outside and out to the main street. Talk to the suspicious man, then talk to the man in the truck. Enter the Mayor's office on the right and talk to Andiswa. Return outside, then go left and approach the cinema. Talk to the couple standing outside. Talk to the cashier, then examine the popcorn machine. Go to the dark alley and talk to Moe and Vince, who will give you corn in exchange for alcohol and cigars.
Go to the alley outside Arnie's and give your nachos to the pigeon. Pick up the plunger, then head inside. Use the plunger on the drain, then use your empty bottle on the drain to half fill it with waste from the bar. Make sure you pick up the plunger again, as you will need it later. Go out to the lighthouse and fill your bottle from the teapot over the fire. Next head back to the Mayor's office and take some cigars from the box on the left. Go back to the alley and give the cigars and alcohol to Moe, then open the crate and take the corn. Head back to the cinema and put your corn in the popcorn machine, then take your free movie tickets. Return to Arnie's bar and give the movie tickets to the sad sailor, in exchange for his video cassette.
Go to the harbor and enter the large building which is the train station - there are troops blocking your path. Return to Arnie's and examine the radio. Adjust the frequency until you find the public band at 99.4. Go to the lighthouse and head upstairs, then examine the radio there. Remove the current record by pressing the lit button. Now adjust the transmitting frequency to 99.4. Press the middle button to send a coded message to the troops.
Go to the train station and examine the crates, then go through the doorway at the back of the hall. Search the junk pile on the left to get an old oil can. Look down from the end of the platform and talk to Kito. Try using the elevator, but it is pitch black at the top and you need to find a light source. Go to the lighthouse and try to use the doohickey, but Merton will stop you. Climb up the stairs and try to use the reel for the pulley. Use your oil can on the reel, then attach the model ship to the pulley before using the reel. Go back downstairs and use the doohickey. Pull the lever so the indicator stops exactly at south-east. Go back to the train station and up in the elevator, and your airplane will end up in the harbor.
Go to the alley outside Arnie's and through the back entrance, then you will automatically go up in the elevator into Club Temba. Look at the door with the keypad and try combinations of dirty keys until you get the correct combination of 851. Go inside and read the note on the wall, then look at the video storage. Use your video cassette on the video storage to automatically fool the guard. Go back out and examine the large doors to realize there is a guard on the other side. Examine the window, then use your plunger on it and climb outside. When you reach the black triangle on the wall, knock it in, until you can climb into the vault. Pick up the book.
Talk to Lina, then look at the ate. Look at the book and the clock on the table - it is 10am. Search the tent to find a machete. Walk up the beach and talk to Kito. Examine the runes on the pillars behind him. Use your machete on the jungle, then click on the larger plants until you discover a path. Look at the large door, and adjust the 4 columns to match the patterns shown in the book on the table:
- Half-filled circles
- Zig-zag with dots
- Arcs and lines
- Horizontal and vertical lines
Go through the door once it has opened. Walk to the observatory in the background. Press the button on the left rock until the triangle points at a lightning rune on the spinning structure. Look through the observatory and you should see the moon in the sky. Return to the previous open area and look at the runes in the ground. Now examine the navigation book in your inventory, and in particular look at Chapter 7. Remembering that it is currently 10am, you are interested in the Path of the Wave. Look at the runes in the ground again and press the star rune in the middle until the star rune around the outside is lined up with the wave rune. Press the moon rune in the middle until the moon rune around the outside is lined up with the lightning rune.
Now press the button on the stone to the left here and one of the large runes on the columns above will be depressed - this is the one that is currently lined up with the swirl rune in the ground. Press the swirl rune in the ground, then press the button on the stone again, and the next large rune will be depressed. Repeat this until all 6 large runes are depressed. Look at the new raised pedestal in the middle of the runes and take the golden idol.
Go back to the gate and talk to Lina, then use your idol on the figure in the gate.
These walkthroughs may not be published or reproduced in any format without the author's prior written consent. All game titles, art and character references remain the copyright of their respective holders. View our Privacy Policy .
- The Journey Down: Chapter Two Achievements
- The Journey Down: Chapter Two News
- Walkthrough *

2. The Journey Down: Chapter Two General hints and tips
Hints and Tips
All non-storyline potentially missable achievements are highlighted in an info box
There is no speed run achievement for this chapter.
Dragon's Dogma 2: The Guardian Gigantus quest walkthrough
Learn how to tackle a giant statue from the deep in The Guardian Gigantus
Looking for a walkthrough for the main quest The Guardian Gigantus in Dragon's Dogma 2? There's a behemoth statue lurking in the depths of the ocean in Dragon's Dogma 2 , and this quest sees it rising to the surface and causing extreme havoc. If climbing the backs of ogres, minotaurs, and griffins wasn't enough, try this massive fellow on for size!
This is technically a quest where you can play the role of a passive observer, or go for broke and attack as much as you want. We've detailed the Gigantus' path of destruction in the following The Guardian Gigantus walkthrough.
For our full walkthrough of the entire game or to find a different quest, visit our Dragon's Dogma 2 walkthrough guide!
The Guardian Gigantus quest walkthrough
The Guardian Gigantus objectives:
- Pursue Phaesus and his lackeys through the Spellseal Door.
- (Optional) Fight the Guardian Gigantus.
- (Optional) Explore Agamen Volcanic Island.
- Enter Moonglint Tower.
"The Guardian Gigantus" begins with Phaesus , the false Sovran, and their assorted henchpeople marching through the Spellseal Door south of Bakbattahl. Head there with your pawns and pursue Phaesus along the road and coastline. You'll soon see the Guardian Gigantus - a massive living statue - emerge from the water and begin approaching Agamen Volcanic Island , the southeastern region on the world map of Dragon's Dogma 2.
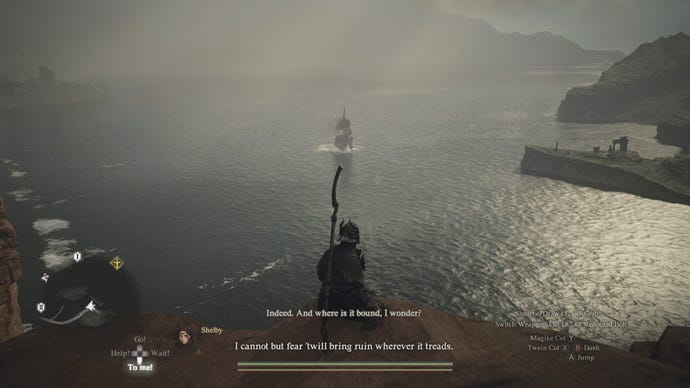
Tackling the Guardian Gigantus is an interesting affair. Technically, the game encourages you to make chase as it marches towards Moonglint Tower in the south of Agamen Volcanic Island, but you can also choose to stand back and do nothing. That said, we encourage you to go after it if you want an extremely hefty 19,000+ experience points . Also, you're the Arisen! You were born to face big statues emerging from the depths!
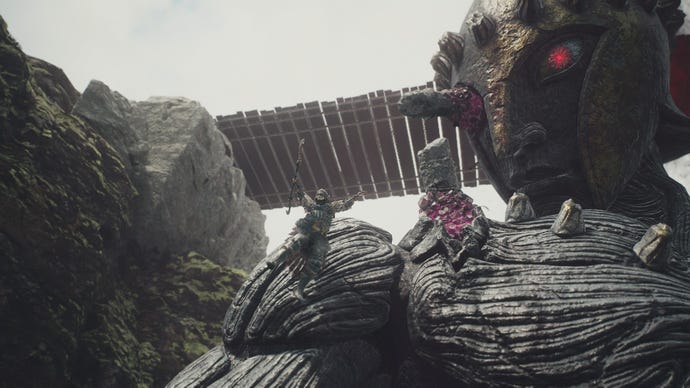
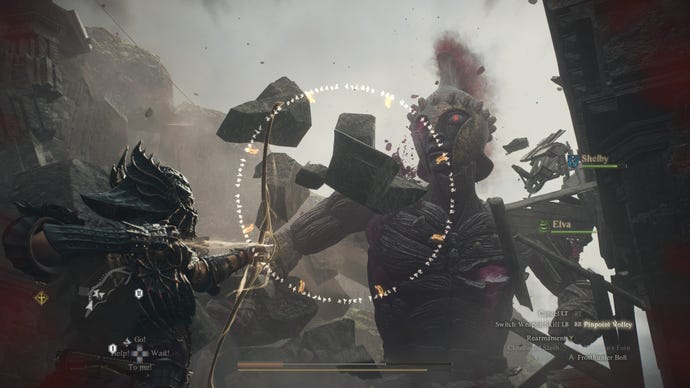
If you decide to chase the Gigantus, it'll smash and destroy everything in its path. To slow it down and deal damage, attack the purple spikes sticking out of its body. If your Arisen has ranged capabilities, shooting at the purple weak points from afar isn't too difficult. If you have no range, you'll need to leap from the cliffs onto the Gigantus' body and climb over to the spikes to smash them. Watching your Stamina (and avoiding falling to your doom) will be the hardest part of this battle, but luckily the giant's frame has several sections where you can stand and take a breather if you need one.
As the Gigantus gets closer to Moonlight Tower, a host of NPCs will join the combat, and you'll see Volcanic Island troops firing ballistae to bring the statue to its knees. After passing through a magma river , the Gigantus will begin to stagger, and this is the final stretch where you need to bring out your biggest attacks to destroy it.
After the Gigantus has been felled, you can finally relax for a few precious moments. If you've been following our walkthroughs and haven't veered off the beaten path, this will likely be your first time in Agamen Volcanic Island. Feel free to explore the island, and check out our guides to unlocking the Magick Archer and Mystic Spearhand vocations, both of which require trips to the Volcanic Island Camp - one of the best towns in Dragon's Dogma 2 for high-quality weapons and armor.
When you're ready to progress the story, venture towards Moonglint Tower to confront Phaesus and your destiny. The following quest, "Legacy," technically won't be unlocked until you reach the top of the tower, but for all intents and purposes, this is the end of "The Guardian Gigantus."

Next quest: Legacy
The endgame of Dragon's Dogma 2 is in sight, and combat with the titular Dragon is imminent. If you want to gain a few levels or perhaps try out a fresh vocation prior to the showdown, try reading our comprehensive guides to the Archer , Fighter , Mage , Magick Archer , Mystic Spearhand , Sorcerer , Thief , Trickster , Warrior , and Warfarer . We've also got full rundowns of the best weapons and best armor in Dragon's Dogma 2.
Today's NYT Connections hint and answers (Sun, Apr 21)
Wordle hint and answer today #1037 (April 21 2024)
Past Wordle answers
NYT Connections hint and answers (Sat, Apr 20)
Wordle hint and answer #1036 (April 20 2024)
Honkai Star Rail codes (April 2024)
No Rest For The Wicked: How to save your game
No Rest For The Wicked: How to repair equipment
- PlayStation 3
- PlayStation 4
- PlayStation 5
- Xbox Series
- More Systems
The Journey Down: Chapter Two – Guides and FAQs
Playstation 4 ios (iphone/ipad) linux macintosh nintendo switch pc xbox one, foreign language guides.
- Guide and Walkthrough (Italian) by nick101ntl PC v.3.2, 20KB, 2015
Want to Write Your Own Guide?
You can write and submit your own guide for this game using either our full-featured online editor or our basic text editor . We also accept maps and charts as well.

The Journey Down: Chapter Two

IMAGES
VIDEO
COMMENTS
Part 1: On the Biko. Go to the bottom right down to the plane. Collect the screwdriver from the toolbox. Use the screwdriver to pry out the compass from the cockpit. Grab the tape seatbelt. Go ...
Go right to the net that leads to the plane. Inside the plane. Take the screwdriver. Take the duct tape hanging from the ceiling. Use the screwdriver to loosen the compass. On the Biko. Use duct tape on wires underneath the "BIKO" sign. Go to cabin. Ship's cabin.
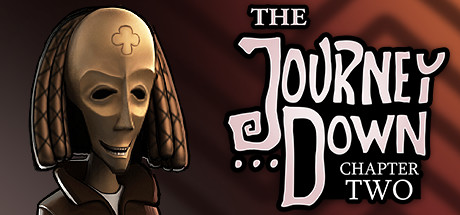
The Journey Down Chapter 2 is the second of 3 chapters in a 3rd person adventure series by SkyGoblin, continuing on from The Journey Down Chapter 1. You take the role of Bwana, a Rastafarian gas station owner, teaming up with your foster brother Kito. In this game you arrive at Port Artue, on your way to the Underland, and are thrown in jail by ...
The Journey Down: Chapter Two Story walkthrough. The Journey Down: Chapter 2 The Biko Deck. You can talk to Joe and Lina. Look at the sign to find out the ship is called the Biko. Hide ads.
The Journey Down: Chapter Two Walkthrough overview Far below the noisy metropolis of St. Armando, Bwana follows in the footsteps of his lost father together with Kito and Lina.
Bond takes us through chapter 2 of The Journey Down. Along the way he grabs all the achievements/trophies as well!
The Journey Down: Chapter Two 2 - Gameplay Walkthrough Part 1Chapter Two of the three-part point and click adventure game series The Journey Down. Available ...
Welcome to my 100% Achievement/Trophy Guide for The Journey Down: Chapter Two.Normally on its own your looking at a hefty £15.99! But the trilogy.. IE ALL 3 ...
***** * * * THE JOURNEY DOWN * * Chapter 2 - Into the Mist * * * ***** Tipo di guida: Soluzione Versione: 3.2 Ultimo aggiornamento: 31/08/2015 Autore: Nick101NtL E-mail: [email protected] ===== Indice dei contenuti ===== 1) Introduzione 2) Consigli 3) Soluzione 3.1) Il recupero dell'orientamento 3.2) La fuga dalla prigione 3.3) Il cambio dei vestiti 3.4) L'intrusione nel club 3.5) L ...
It's a tricky one. After one hour i got it. The moon at black tree. The Star at the cage. The swirl must be rotated to every single slot. For every move of the swirl symbol press the button and you will see it coming!
Steam Community: The Journey Down: Chapter Two. The Journey Down: Chapter Two 2 - Gameplay Walkthrough Part 2 Chapter Two of the three-part point and click adventure game series The Journey Down. Available now for Pc, Mac and Linux as well as iOS.
For The Journey Down: Chapter Two on the Nintendo Switch, GameFAQs has 1 guide/walkthrough.
For The Journey Down: Chapter Two on the PC, GameFAQs has 1 guide/walkthrough.
Hints and Tips. All non-storyline potentially missable achievements are highlighted in an info box. There is no speed run achievement for this chapter. 3. Story walkthrough 1. Walkthrough overview.
On September 2, 2014 by Master. Bwana's adventure continues in The Journey Down Chapter 2. Our walkthrough will guide you through each section fast and easy. The guide is separated into parts group by locations or missions. Each part you will need to use available resources to solve a problem in order to help Bwana accomplish his goals.
The Journey Down: Chapter Two 2 - Gameplay Walkthrough Part 3Chapter Two of the three-part point and click adventure game series The Journey Down. Available ...
For The Journey Down: Chapter Two on the Xbox One, GameFAQs has 1 guide/walkthrough.
Steam Community: The Journey Down: Chapter Two. The Journey Down: Chapter Two 2 - Gameplay Walkthrough Part 4 Chapter Two of the three-part point and click adventure game series The Journey Down. Available now for Pc, Mac and Linux as well as iOS.
Share your videos with friends, family, and the world
The Guardian Gigantus quest walkthrough. The Guardian Gigantus objectives: Pursue Phaesus and his lackeys through the Spellseal Door. (Optional) Fight the Guardian Gigantus. (Optional) Explore Agamen Volcanic Island. Enter Moonglint Tower. "The Guardian Gigantus" begins with Phaesus, the false Sovran, and their assorted henchpeople marching ...
The second part of Zack Snyder's Rebel Moon space opera delivers a half-baked conclusion to a well-trodden story with flimsy character studies and lacklustre action.
You can write and submit your own guide for this game using either our full-featured online editor or our basic text editor. We also accept maps and charts as well. For The Journey Down: Chapter Two on the PlayStation 4, GameFAQs has 1 guide/walkthrough.
The Journey Down: Chapter Two - Far below the noisy metropolis of St. Armando, Bwana follows in the footsteps of his lost father together with Kito and Lina. In their search for the mysterious Underland, they discover a dark conspiracy shrouding the fate of Captain Kaonandodo.In the second chapter, the plot thickens as our heroes plunge down into the mist below the Edge and wind up in the ...
5 Lives Studios has released a seven-minute walkthrough video for Cozy Caravan, its recently announced game about anthropomorphic characters traveling from town to town as part of a guild dedicated…
The Journey Down: Chapter Two - Far below the noisy metropolis of St. Armando, Bwana follows in the footsteps of his lost father together with Kito and Lina. In their search for the mysterious Underland, they discover a dark conspiracy shrouding the fate of Captain Kaonandodo.In the second chapter, the plot thickens as our heroes plunge down into the mist below the Edge and wind up in the ...